
I remember the first time I popped a frozen grape into my mouth. It was a hot summer afternoon, and I needed something cold, light, and naturally sweet. I didn’t want to rely on sugar-packed ice creams or artificial popsicles, so I reached for a bowl of grapes, rinsed them, and tossed them into the freezer. A few hours later, I had discovered my new favorite summer snack.
Frozen grapes are more than just a refreshing treat. They bring back that nostalgic joy of finding simple solutions in the kitchen—ones that work every time. They’re now a staple in my freezer, ready to be served to guests, packed into lunchboxes, or tossed into drinks to add a chill without watering them down.
Why You’ll Love This Recipe
This recipe is one of the easiest you’ll ever try, but don’t let the simplicity fool you—it delivers big on flavor, texture, and satisfaction. Each bite bursts with natural sweetness and a delightful chill that makes them hard to resist.
Versatile
Frozen grapes work in many ways. You can use them as a light snack, a cooling addition to fruit platters, or a colorful way to garnish drinks. They also serve well in school lunchboxes, workout snacks, or post-dinner cravings.
Budget-Friendly
Grapes are available year-round in most markets and don’t require any expensive tools or ingredients to prepare. A single bunch of seedless grapes can be transformed into a frozen treat with just a few minutes of effort. There’s no need for fancy ingredients or preservatives—just fresh grapes and a freezer.
Ingredients for Frozen Grapes
-
2 cups seedless grapes (you can use red, green, or a mix for color and variety)
That’s all you need! This one-ingredient snack makes the process even more appealing for busy parents, health-conscious eaters, or anyone wanting a guilt-free sweet fix. Because grapes contain natural sugars and nutrients, they also fit perfectly into most healthy eating plans.
Whether you’re preparing a summer picnic or just want something to satisfy your sweet tooth, frozen grapes offer a delicious, hydrating alternative to processed snacks. They’ve become my go-to solution for smart snacking—simple, quick, and endlessly enjoyable.
How to Make Frozen Grapes at Home
Making frozen grapes is incredibly easy, but a few key steps ensure they turn out perfect every time. I’ve made this snack countless times, and each time, I follow the same reliable method. It takes only a few minutes to prepare, and the result is a naturally sweet frozen snack that feels like a mini dessert.
Let’s walk through it step-by-step so you can enjoy these right away.
Step-by-Step Instructions for Making Frozen Grapes
1. Wash the Grapes Thoroughly
First, place your seedless grapes in a colander and rinse them well under cold running water. This step is important because it removes any surface dirt, dust, or pesticide residue. You want your grapes clean and fresh before freezing.
2. Dry the Grapes Completely
After washing, lay the grapes on a clean kitchen towel or use paper towels to pat them dry. Moisture on the surface can lead to ice crystals forming, which may affect texture. That’s why it’s best to dry them thoroughly before moving to the next step.
3. Remove the Stems
Next, detach each grape from the stem. You might be tempted to freeze them on the vine, but removing the stems first makes it easier to snack on them later. It also helps with even freezing and better storage.
4. Spread the Grapes on a Tray
Once the grapes are stem-free and dry, line a baking sheet or tray with parchment paper. Arrange the grapes in a single layer. This prevents them from sticking together during freezing and keeps their shape intact. Don’t overcrowd them.
5. Freeze Until Firm
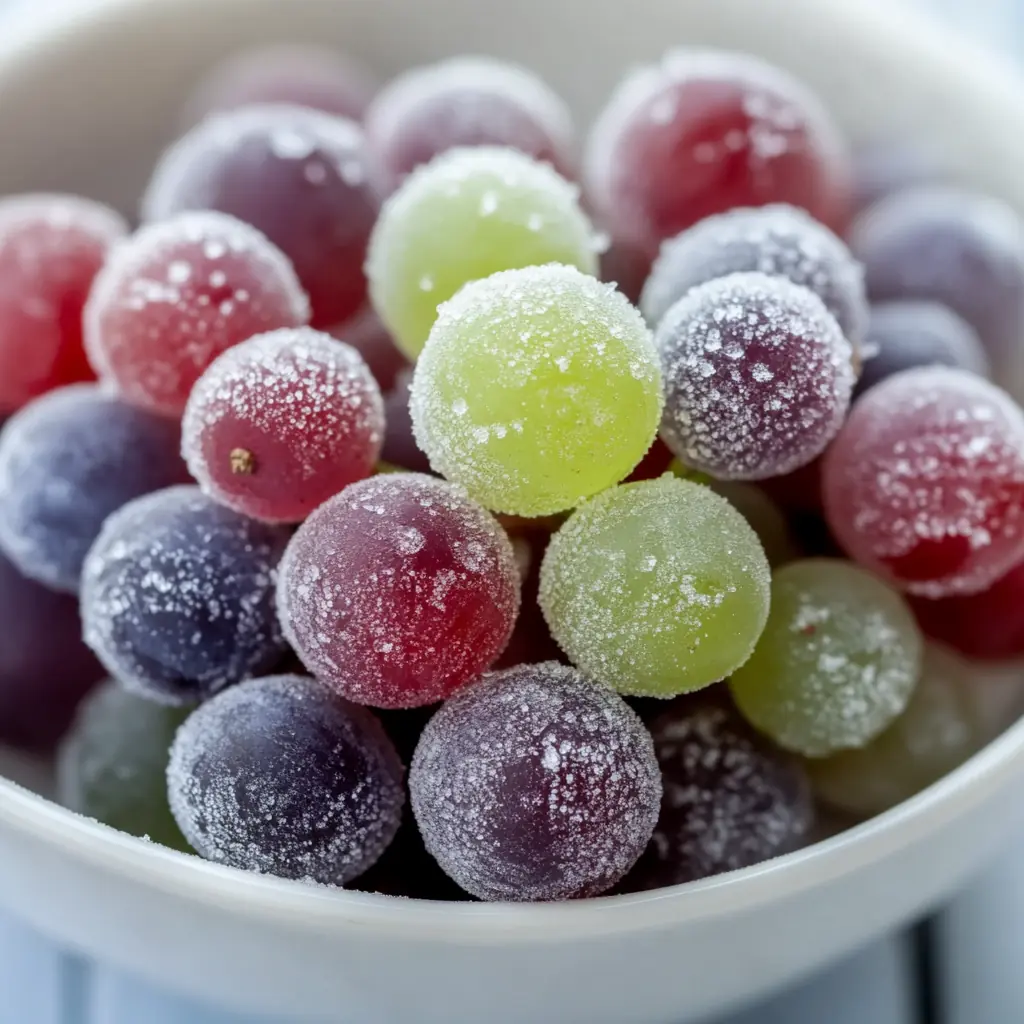
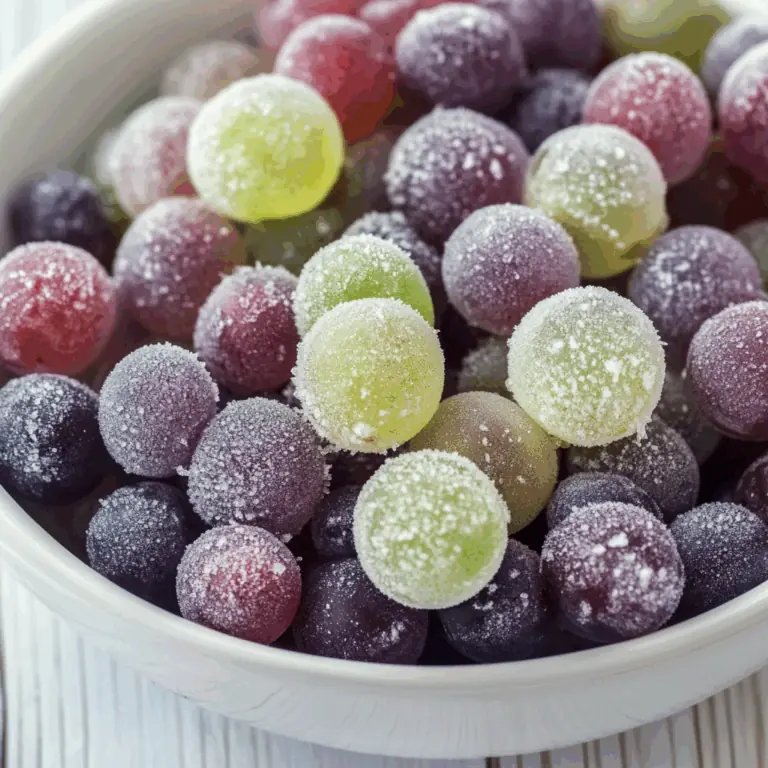
Place the tray of grapes in your freezer. Let them freeze for at least 2 to 4 hours. I usually check after 2 hours; they should feel firm but not rock-hard. If you want them super frosty, go for 4 hours. Leaving them overnight also works fine.
6. Store for Future Snacking
Once frozen, transfer the grapes to an airtight container or a zip-top freezer bag. This step keeps them fresh and prevents freezer burn. I always keep a batch ready in my freezer for whenever I want a cool, sweet bite.
Quick and Easy
This method is so quick that it fits right into any schedule. Whether you’re preparing snacks for kids before school or need a low-effort dish for a gathering, frozen grapes come together in no time. The prep takes about 10 minutes. After that, the freezer does all the work.
You don’t need cooking experience, a long list of ingredients, or kitchen gadgets. In fact, you only need one ingredient and a baking sheet. It’s that simple.
Customizable
While grapes are naturally sweet, you can customize this snack if you like extra flavor. Here are a few ideas I sometimes use before freezing:
-
Roll grapes in lemon or lime juice, then in coconut sugar or ground cinnamon.
-
Add a sprinkle of chili powder for a spicy twist.
-
Toss grapes in a little vanilla extract (alcohol-free) for a soft, fragrant aroma.
These variations take only an extra minute and can elevate your frozen grapes to something truly unique.
You can also mix green and red grapes for contrast in flavor and color. Green grapes tend to be tart and crisp, while red grapes are often sweeter. Combining both gives the perfect balance.
Crowd-Pleasing
Kids love frozen grapes because they’re easy to eat, sweet, and fun to grab by the handful. Adults appreciate them as a light dessert or a frozen side dish with drinks. I’ve served them at brunches, picnics, and even birthday parties—people always ask how they’re made.
They’re also a great addition to chilled drinks. Drop them into sparkling water or juice instead of ice cubes. They keep the drink cold without diluting the flavor. This trick is always a hit during warm-weather get-togethers.
Additionally, frozen grapes are suitable for many dietary needs. They’re gluten-free, dairy-free, vegan, and contain no added sugar. This makes them an inclusive snack that almost anyone can enjoy.
From healthy eating to simple indulgence, frozen grapes check all the boxes. They’re refreshing, beautiful in presentation, and require almost no work to prepare.
Frequently Asked Questions (FAQs)
Can I freeze grapes with seeds?
While it’s possible to freeze grapes with seeds, I recommend using seedless varieties. Grapes with seeds can be unpleasant to bite into when frozen and may disrupt the smooth snacking experience.
How long can frozen grapes be stored?
Frozen grapes can be stored for up to two months in an airtight container. For best texture and flavor, consume them within the first month.
Do frozen grapes get mushy when thawed?
Yes, once thawed, grapes tend to become soft and mushy. That’s why they are best enjoyed while still frozen. If you want to use them thawed, it’s better to use them in smoothies or sauces.
Can I use frozen grapes in recipes?
Absolutely. Frozen grapes can be blended into smoothies or used to chill fruit punches and juices. They work well in lunchboxes too, keeping other items cool while offering a sweet snack.
Are frozen grapes safe for toddlers?
For very young children, grapes should always be cut in half to reduce choking risk—even when frozen. Always supervise when serving them to kids.
Do I need to peel the grapes before freezing?
No peeling is needed. The skin helps retain the shape and flavor during freezing.
Frozen Grapes
Frozen grapes are a naturally sweet and refreshing snack that’s quick to prepare and loved by all ages. They’re perfect for hot days, healthy snacking, or adding a chill to your favorite drinks.
- Total Time: 10 minutes
- Yield: 4 servings 1x
Ingredients
2 cups seedless grapes (red, green, or a mix)
Instructions
-
Wash the Grapes: Rinse the grapes thoroughly under cold running water to remove any dirt or pesticide residue.
-
Dry the Grapes: Use a clean towel or paper towels to pat the grapes dry completely.
-
Remove the Stems: Detach all grapes from their stems for easier freezing and snacking.
-
Spread on Baking Sheet: Line a baking sheet with parchment paper and arrange grapes in a single layer.
-
Freeze: Place the baking sheet in the freezer for 2 to 4 hours, or until the grapes are firm.
-
Store: Once frozen, transfer grapes to an airtight container or zip-top bag. Keep stored in the freezer until ready to eat.
Notes
-
Use seedless grapes for best results.
-
For extra flavor, toss grapes in lemon juice or vanilla extract (alcohol-free) before freezing.
-
Ideal for parties, kids’ snacks, or healthy desserts.
- Prep Time: 10 minutes