
Whenever I bake a vanilla cake, it feels like I’m bringing a little piece of joy to my kitchen. The aroma that fills the room as the cake bakes is pure comfort. This classic recipe never fails me — it’s soft, fluffy, and has that perfect balance of sweetness that everyone loves. I first made this vanilla cake for a friend’s birthday, and it instantly became one of my most requested desserts.
There’s something nostalgic about a simple vanilla cake. It reminds me of the kind of cakes my grandmother used to make on Sundays. Every bite feels warm and familiar, like home. What I adore most is how effortlessly elegant it looks when layered and frosted. Whether for birthdays, weddings, or tea parties, it’s always the centerpiece of celebration.
Why You’ll Love This Recipe
You’ll fall in love with this vanilla cake for so many reasons. It’s light, moist, and incredibly tender. The layers bake up beautifully golden, and they hold together perfectly for stacking. The smooth, creamy buttercream complements the vanilla flavor so well that every slice melts in your mouth.
This cake is also perfect for decorating. It’s sturdy enough to handle layers, yet delicate when you cut into it. The flavor is pure and simple, making it ideal for adding fillings like fruit preserves or cream cheese frosting. Plus, you can easily transform it into cupcakes or mini cakes without changing much in the recipe.
Versatile
One of the things I appreciate most about this recipe is how versatile it is. You can pair it with chocolate ganache, strawberry filling, or even lemon frosting. It also works perfectly as a base for layered cakes with different themes.
Budget-Friendly
You don’t need any fancy or expensive ingredients to make this vanilla cake. Everything comes from basic pantry staples: flour, sugar, eggs, and butter. With just a few simple steps, you can create a bakery-quality cake at home for a fraction of the cost.
Ingredients for Vanilla Cake
-
2 cups cake flour (280 g)
-
1 teaspoon salt
-
2 ½ teaspoons baking powder
-
¼ teaspoon baking soda
-
4 egg whites
-
2 sticks butter (226 g, room temperature)
-
1 ¼ cups sugar (280 g)
-
2 teaspoons vanilla
-
1 cup milk (room temperature)
-
½ cup sour cream (125 g, room temperature)
How to Make Vanilla Cake
Whenever I prepare this vanilla cake, I follow a simple rhythm that always leads to perfect results. The process is relaxing, and the smell of the cake baking is simply irresistible. With each step, I can see the transformation from a few simple ingredients into a beautiful, golden masterpiece.
Step-by-Step Instructions for Making
Step 1: Prepare the pans and preheat the oven
I start by preheating my oven to 350°F (177°C). Then, I grease and flour three 6-inch cake tins and line them with parchment paper. This step is important because it prevents the cakes from sticking and helps them release cleanly once baked.Step 2: Combine dry ingredients
Next, I take a medium-sized bowl and whisk together the cake flour, salt, baking powder, and baking soda. Mixing them in advance ensures that the leavening agents are evenly distributed, which gives the cake its soft and uniform texture.Step 3: Prepare the milk mixture
In another small bowl, I combine the milk, sour cream, and vanilla. These wet ingredients help keep the cake moist and flavorful. I always make sure they’re at room temperature because that helps everything blend more smoothly later.Step 4: Cream the butter and sugar
Using my stand mixer with the paddle attachment, I beat the butter and sugar together on medium speed for about 3 minutes. The goal is to get a light and creamy mixture. It’s important to scrape down the sides of the bowl to make sure everything is evenly mixed. This step adds air to the batter, which helps the cake rise beautifully.Step 5: Add the egg whites
After that, I whisk the egg whites with a fork until lightly foamy, then slowly drizzle them into the butter mixture while the mixer runs on low speed. Once all the egg whites are added, I increase the speed to high for about one to two minutes. The mixture may look a bit curdled at first, but it soon becomes smooth and silky again.Step 6: Combine dry and wet mixtures
Now comes the most delicate part. On low speed, I add half of the dry ingredients and mix gently until just combined. Then I pour in half of the milk mixture and mix again. I repeat this process with the remaining dry and wet ingredients. To finish, I use a rubber spatula to fold the batter by hand, ensuring there are no dry spots. Overmixing can make the cake dense, so I stop as soon as everything looks smooth.Step 7: Bake the cake
I divide the batter evenly between the prepared pans, filling each about a third of the way full. The cakes bake for about 30 to 35 minutes. To check if they’re done, I insert a toothpick into the center — if it comes out clean, the cakes are ready.Step 8: Cool completely
Once baked, I let the cakes cool in the pans for about 15 to 20 minutes. Then I gently remove them and place them on a wire rack to cool completely. This step prevents condensation from forming, which could make the layers soggy.Quick and Easy
Even though the recipe looks detailed, it’s actually quick once you’ve prepared everything in advance. You can mix the dry ingredients the night before and have the wet ingredients at room temperature before starting. The batter comes together in minutes, and the cakes bake in just over half an hour. It’s perfect for busy days when you still want to bake something special.
Customizable
What I love most about this vanilla cake is how adaptable it is. You can flavor the batter with a hint of lemon zest or almond extract for variety. You can also color the layers for a fun surprise when cutting into the cake. If you want a rich dessert, you can add buttercream between each layer, or simply dust it with powdered sugar for a lighter treat.
For celebrations, I sometimes fill the layers with fruit jam or whipped cream. It also tastes great with chocolate or strawberry frosting. The neutral vanilla flavor complements nearly anything, making this recipe a true canvas for creativity.
Crowd-Pleasing
This cake is always a hit at gatherings. Its soft, fluffy crumb and balanced sweetness make it loved by both kids and adults. Whenever I serve it, there’s rarely a slice left over. Guests always ask for the recipe, which tells me everything I need to know — it’s a winner.
FAQs
1. Can I use all-purpose flour instead of cake flour?
Yes, you can, but the texture will be slightly denser. If you don’t have cake flour, measure two cups of all-purpose flour, remove two tablespoons from each cup, and replace them with two tablespoons of cornstarch. Sift well before using to achieve a softer crumb.2. How do I know when my cake is perfectly baked?
Insert a toothpick into the center of the cake after about 30 minutes. If it comes out clean or with just a few crumbs, it’s ready. The edges should also slightly pull away from the pan. Avoid overbaking, as that can make the cake dry.3. Can I make this recipe into cupcakes?
Absolutely. This vanilla cake recipe works beautifully for cupcakes. Simply divide the batter into a lined cupcake pan, filling each liner two-thirds full. Bake for 18–20 minutes at the same temperature, then test with a toothpick.4. How should I store this cake?
I store mine in an airtight container at room temperature for up to two days or in the refrigerator for up to five days. If frosted, cover lightly to prevent drying. You can also freeze the unfrosted layers for up to three months.5. Can I use plant-based milk or vegan butter?
Yes, you can substitute regular milk with any plant-based milk like almond or oat milk, and use vegan butter instead of regular butter. It slightly changes the flavor but keeps the texture soft and moist.
Vanilla Cake
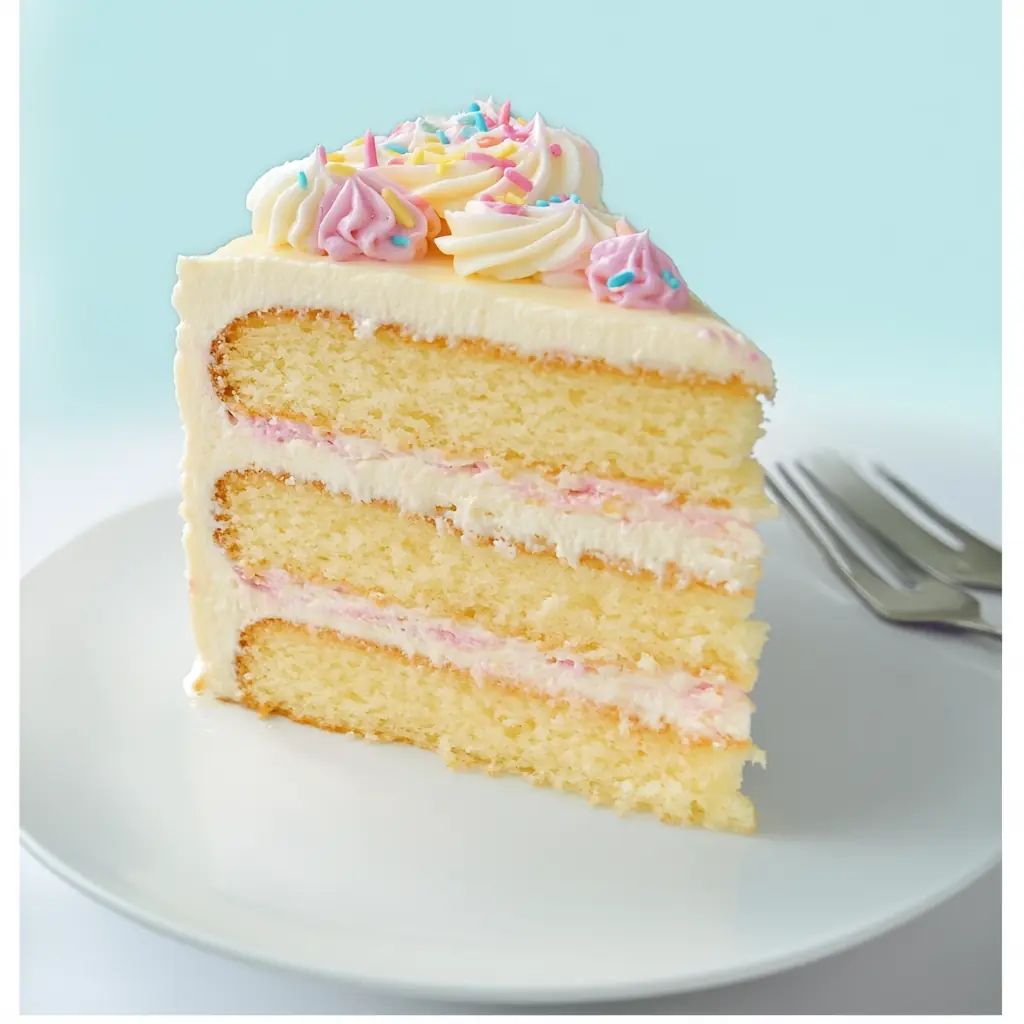
This classic Vanilla Cake is soft, fluffy, and full of rich vanilla flavor. It’s perfect for birthdays, celebrations, or any special occasion. The layers bake evenly, creating a tender crumb that pairs beautifully with your favorite frosting or filling. Simple ingredients come together to make a bakery-quality cake right in your kitchen.
- Total Time: 55 minutes
- Yield: 10 servings 1x
Ingredients
Scale-
2 cups cake flour (280 g)
-
1 teaspoon salt
-
2 ½ teaspoons baking powder
-
¼ teaspoon baking soda
-
4 egg whites
-
2 sticks butter (226 g, room temperature)
-
1 ¼ cups sugar (280 g)
-
2 teaspoons vanilla
-
1 cup milk (room temperature)
-
½ cup sour cream (125 g, room temperature)
-
1 cup butter (227 g, room temperature)
-
½ cup shortening (100 g)
-
6 cups sifted powdered sugar (750 g)
-
¼ cup milk
-
1 tablespoon vanilla
Instructions
-
Preheat oven to 350°F (177°C). Grease and flour three 6-inch cake tins and line with parchment paper.
-
Whisk together cake flour, salt, baking powder, and baking soda in a medium bowl. Set aside.
-
In another bowl, mix milk, sour cream, and vanilla. Set aside.
-
Beat butter and sugar on medium speed for 3 minutes until creamy. Scrape down the sides of the bowl.
-
Whisk egg whites with a fork, then drizzle slowly into the butter mixture while mixing on low speed. Increase speed to high for 1–2 minutes until smooth.
-
On low speed, add half the dry ingredients, then half the milk mixture. Repeat with remaining ingredients. Gently fold by hand until just combined.
-
Divide batter evenly among the pans. Bake 30–35 minutes, or until a toothpick inserted in the center comes out clean.
-
Cool cakes in the pans for 15–20 minutes, then transfer to a wire rack to cool completely.
-
Frost with your favorite buttercream or keep plain for a light dessert.
Notes
For best results, use room-temperature ingredients. Do not overmix the batter, as it may make the cake dense. The layers can be made a day ahead and stored wrapped in plastic wrap at room temperature.
- Prep Time: 20 minutes
- Cook Time: 35 minutes