

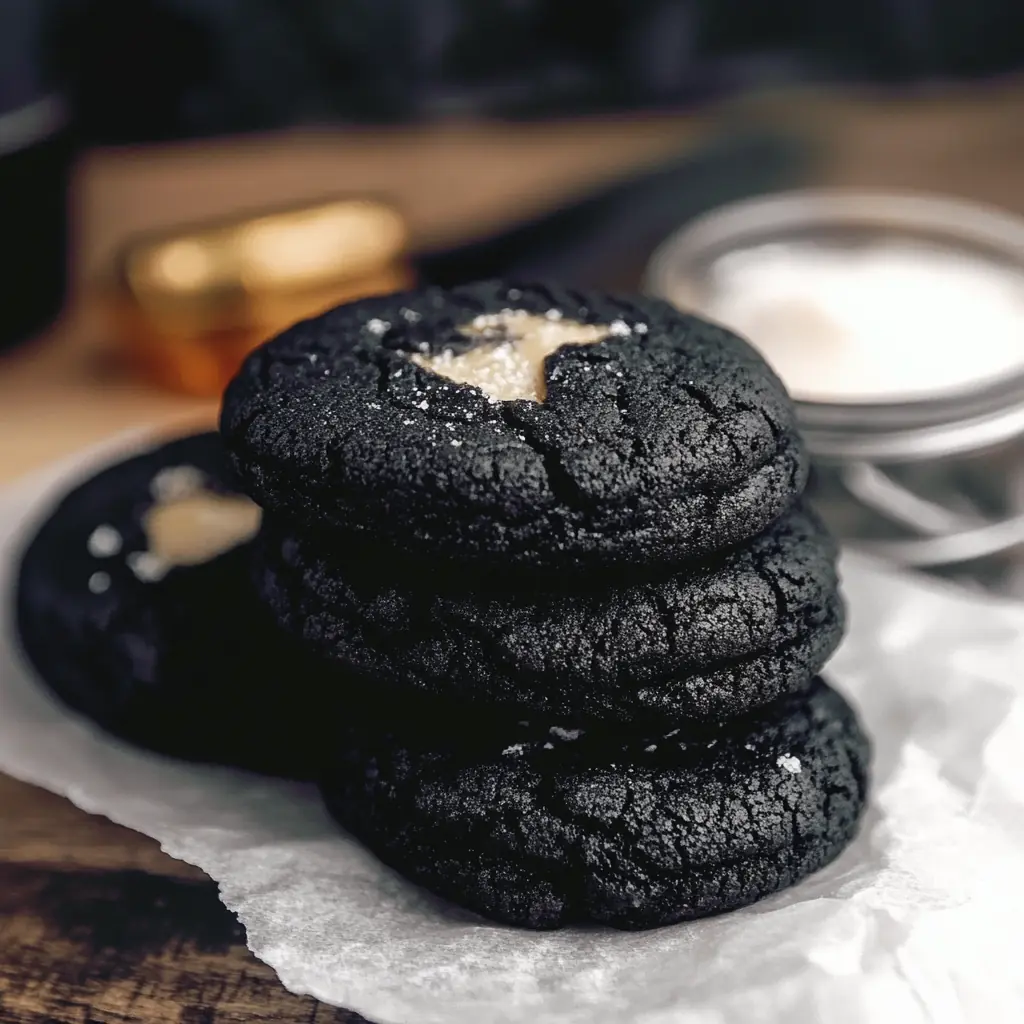
When spooky season arrives, I always crave treats that feel magical, dramatic, and deeply comforting. So, as I stood in my kitchen with black cocoa in one hand and cream cheese in the other, I knew I wanted to create a cookie that tasted like Halloween itself. These black velvet cheesecake cookies came from that moment. I remember thinking about the first time I tasted an Oreo as a kid, and how that rich cocoa flavor stayed with me. Therefore, I wanted to bring that memory back, but in a softer, richer, bakery-style cookie form. As a baker, nothing excites me more than transforming nostalgic flavors into something indulgent and festive. These cookies deliver exactly that. They are dark, mysterious, and soft on the outside, yet creamy at the center. Also, every bite melts with velvety richness.
Yet, this recipe is not just about Halloween. While the deep cocoa color makes them spooky-perfect, they also fit any occasion where you want something dramatic and luxurious. Because of their smooth cheesecake filling, every cookie feels like a surprise treat. And yes, they really do remind me of a gourmet Oreo, but richer, softer, and filled with dreamy cheesecake.
Why You’ll Love This Recipe
To begin with, each cookie has a rich, fudgy texture and a smooth cheesecake center. Also, the black cocoa gives a deep, bold chocolate flavor that feels indulgent. Another reason is that the dough stays soft, and the filling remains creamy after baking. As a result, you enjoy a melt-in-your-mouth sensation. And while the appearance is striking, the method is still simple enough for everyday baking.
Versatile
Although these cookies are amazing for Halloween, they also suit birthdays, festive cookie boxes, or elegant dessert platters. Moreover, you can add colored sugar on top for seasonal themes.
Budget-Friendly
Even though they look bakery-fancy, the ingredients are basic pantry staples. Additionally, the recipe does not require special tools or expensive ingredients, which keeps it economical.
Ingredients for This Recipe
-
Cream cheese
-
Granulated white sugar
-
Vanilla extract (alcohol-free)
-
Black cocoa powder
-
All-purpose flour
-
Baking powder
-
Salt
-
Unsalted butter
-
Light brown sugar
-
Egg yolks
This recipe uses simple baking essentials. Still, the bold color and creamy center make the cookies feel gourmet.
How to Make This Recipe
Whenever I bake these cookies, I like to create the cheesecake filling first. That way, it has time to firm up slightly while I prepare the dough. As always, mise en place keeps everything smooth. Before starting, I gather all ingredients, line a baking sheet, and take a deep breath because baking should feel enjoyable, not rushed. Even though these cookies look dramatic, the process is comfortable and approachable. Also, the dough comes together easily and the filling stays creamy.
Step-by-Step Instructions for Making
Step 1: Prepare the Cheesecake Filling
First, place cold cream cheese into a mixing bowl. Then add 3 tablespoons granulated sugar and 1/2 teaspoon vanilla extract (alcohol-free). Next, beat until smooth and creamy. Because the cream cheese is cold, it will thicken quickly, which is what we want. After mixing, portion the filling into small balls using a teaspoon or small cookie scoop. Then place them on a parchment-lined tray. Next, freeze them while you prepare the cookie dough. This step keeps the filling firm. Consequently, it stays inside the cookie instead of melting out.
Step 2: Prepare the Cocoa Sugar Coating
Next, mix 1/4 cup granulated sugar with 2 teaspoons black cocoa powder in a small bowl. Stir well until fully blended. Later, we will use this mixture to coat the cookie dough. As a result, the cookies will have that signature velvet-dark exterior.
Step 3: Whisk Dry Ingredients
Now, in another bowl, whisk the flour, 1/2 cup black cocoa powder, baking powder, and salt. Because cocoa can clump, whisking ensures a smooth, uniform mix. Also, it helps create tender cookies since everything distributes evenly.
Step 4: Cream Butter and Sugars
In a large bowl, beat softened butter until light. Then add 3/4 cup light brown sugar and 1/4 cup granulated sugar. Beat until fluffy. This process incorporates air, and therefore, the cookies bake soft and thick. Next, add the egg yolks and 1 1/2 teaspoons vanilla extract (alcohol-free). Beat again until combined and creamy.
Step 5: Add Dry Ingredients
After that, gradually add the dry ingredients to the butter mixture. Mix until just combined. Avoid overmixing, because overmixing can toughen the dough. If the dough feels soft, chill it for 10 minutes. Chilling helps hold shape later.
Step 6: Shape the Cookies
Scoop portions of dough. Then flatten each portion gently. Next, place a frozen cream cheese ball in the center. Wrap the dough around it and seal completely. Although it may seem delicate, the dough will surround the filling easily. After shaping each cookie, roll it in the black cocoa sugar mixture. Place cookies on a lined baking tray, leaving space because they spread slightly.
Step 7: Bake
Bake cookies in a preheated oven at 350°F (175°C) for about 10–12 minutes. Because dark cookies can trick the eye, rely on texture: edges should look set while centers appear slightly soft. After removing from the oven, allow cookies to cool on the tray briefly. Then transfer them to a rack. As they cool, the centers remain creamy and the texture sets beautifully.
Quick and Easy
Even though there are two components, the technique is simple. Moreover, freezing the filling guarantees clean shaping. With basic baking tools and simple ingredients, you achieve bakery-level cookies at home.
Customizable
Although these cookies shine as written, you can adjust them for different moods. For example:
-
Add orange sugar on top for a Halloween version.
-
Dust a little powdered sugar for a winter feel.
-
Mix in mini chocolate chips for extra richness.
Because the dough is stable, it handles add-ins well. You can also chill the dough overnight for deeper flavor.
Crowd-Pleasing
Whenever I serve these, people react with delight. The dark color surprises them first. Then the soft bite and creamy cheesecake center win them over. As a result, guests feel like they are eating something luxurious. Also, kids love the Oreo-like taste. Therefore, these cookies suit parties, holidays, and cozy tea moments.
FAQs
Can I use regular cocoa powder instead of black cocoa?
Yes, you can use regular cocoa powder. However, the cookies will not have the same intense color or deep Oreo-like flavor. Still, the texture remains soft and rich, so the cookies will be delicious.
Do I have to freeze the cheesecake filling?
Yes, freezing helps a lot. Although it seems like an extra step, it prevents the filling from leaking during baking. Therefore, you get a creamy center that stays inside the cookie.
Can I make the dough ahead of time?
Absolutely. You can chill the dough for up to 24 hours. In fact, chilling deepens the flavor. Just be sure to store it in an airtight container so the dough stays soft and easy to scoop.
How do I store these cookies?
After baking, store cookies in an airtight container in the refrigerator. Because of the cheesecake filling, refrigeration helps maintain freshness. Warm them slightly before serving for a softer texture.
Can I freeze the cookies?
Yes. You can freeze shaped dough balls with filling inside or freeze the baked cookies. When ready to bake the unbaked dough, allow it to soften slightly, then bake as directed. As a result, you always have fresh cookies ready to enjoy.
Black Velvet Cheesecake Cookies
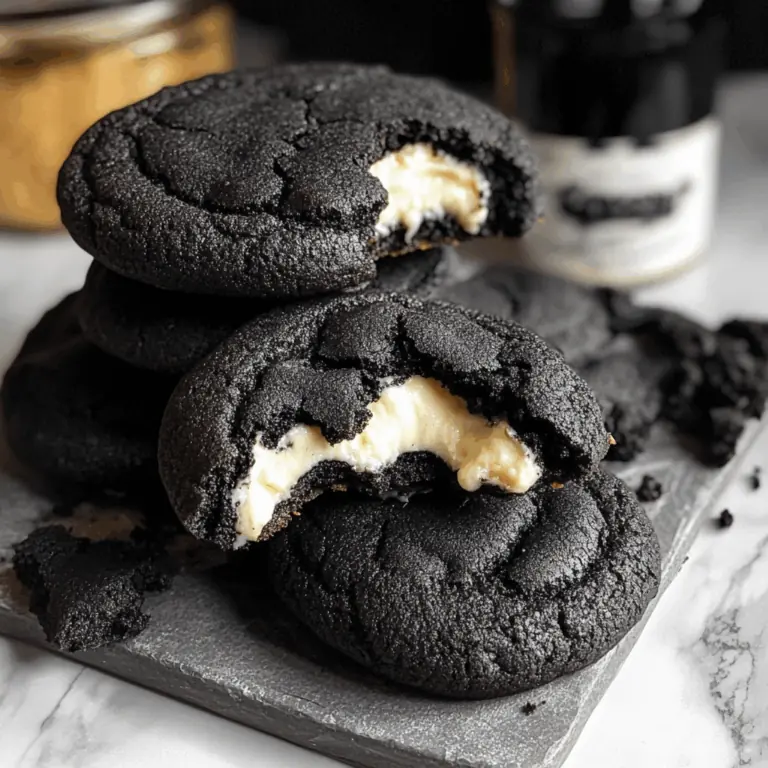
These black velvet cheesecake cookies combine rich black cocoa dough with a creamy cheesecake filling. The result is a soft, dark, Oreo-style cookie with a surprise creamy center. They look dramatic, taste indulgent, and are perfect for Halloween or any occasion that calls for something elegant and fun.
- Total Time: 32 minutes
- Yield: 16 cookies 1x
Ingredients
Cheesecake Filling:
-
6 oz (170 g) cream cheese, cold
-
3 tbsp (38 g) granulated white sugar
-
1/2 tsp Vanilla Extract (Alcohol-Free)
Cocoa Sugar Coating:
-
1/4 cup (50 g) granulated white sugar
-
2 tsp (3 g) black cocoa powder
Cookie Dough:
-
1 1/2 cups (188 g) all-purpose flour, spooned and leveled
-
1/2 cup (40 g) black cocoa powder
-
1/2 tsp baking powder
-
1/2 tsp salt
-
3/4 cup (168 g) unsalted butter, softened
-
3/4 cup (165 g) light brown sugar, packed
-
1/4 cup (50 g) granulated white sugar
-
2 egg yolks, at room temperature
-
1 1/2 tsp Vanilla Extract (Alcohol-Free)
Instructions
-
In a bowl, mix cold cream cheese, 3 tbsp sugar, and Vanilla Extract (Alcohol-Free). Beat until smooth. Scoop into small balls and freeze.
-
In a small bowl, mix 1/4 cup sugar and 2 tsp black cocoa powder. Set aside.
-
In another bowl, whisk flour, black cocoa powder, baking powder, and salt.
-
In a large bowl, beat softened butter until creamy. Add brown sugar and 1/4 cup sugar. Beat until fluffy.
-
Add egg yolks and Vanilla Extract (Alcohol-Free). Mix until smooth.
-
Add dry ingredients gradually. Mix until dough forms. Chill if very soft.
-
Scoop dough, flatten each portion, and place a frozen cheesecake ball inside. Seal and shape into a ball.
-
Roll each dough ball in the cocoa sugar mixture.
-
Place shaped cookies on a lined baking sheet.
-
Bake at 350°F (175°C) for 10–12 minutes. Centers should look slightly soft.
-
Let cookies cool on the tray briefly, then move to a rack to finish cooling.
Notes
Freeze the cheesecake filling before stuffing; it prevents leakage. If dough feels soft, chill briefly. Cookies store best in the refrigerator and can be warmed slightly before serving.
- Prep Time: 20 minutes
- Cook Time: 12 minutes