
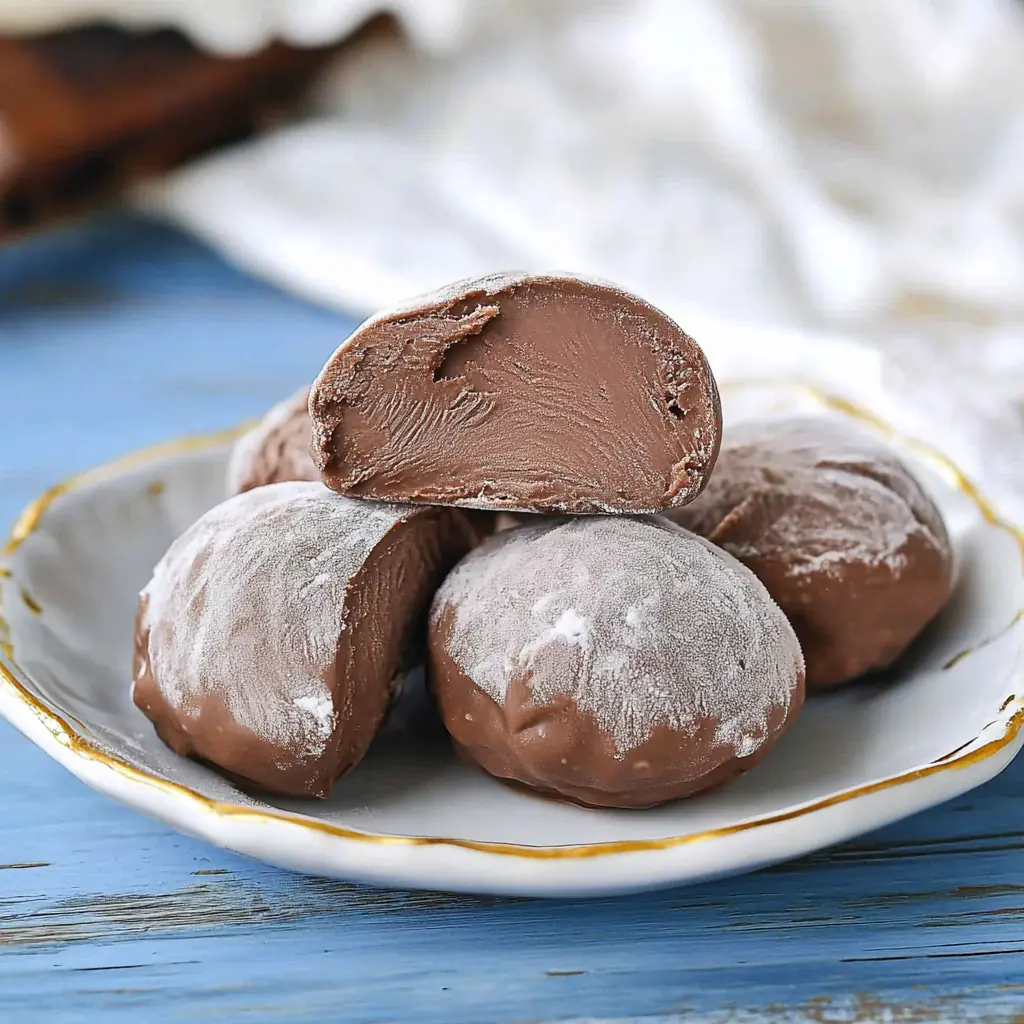
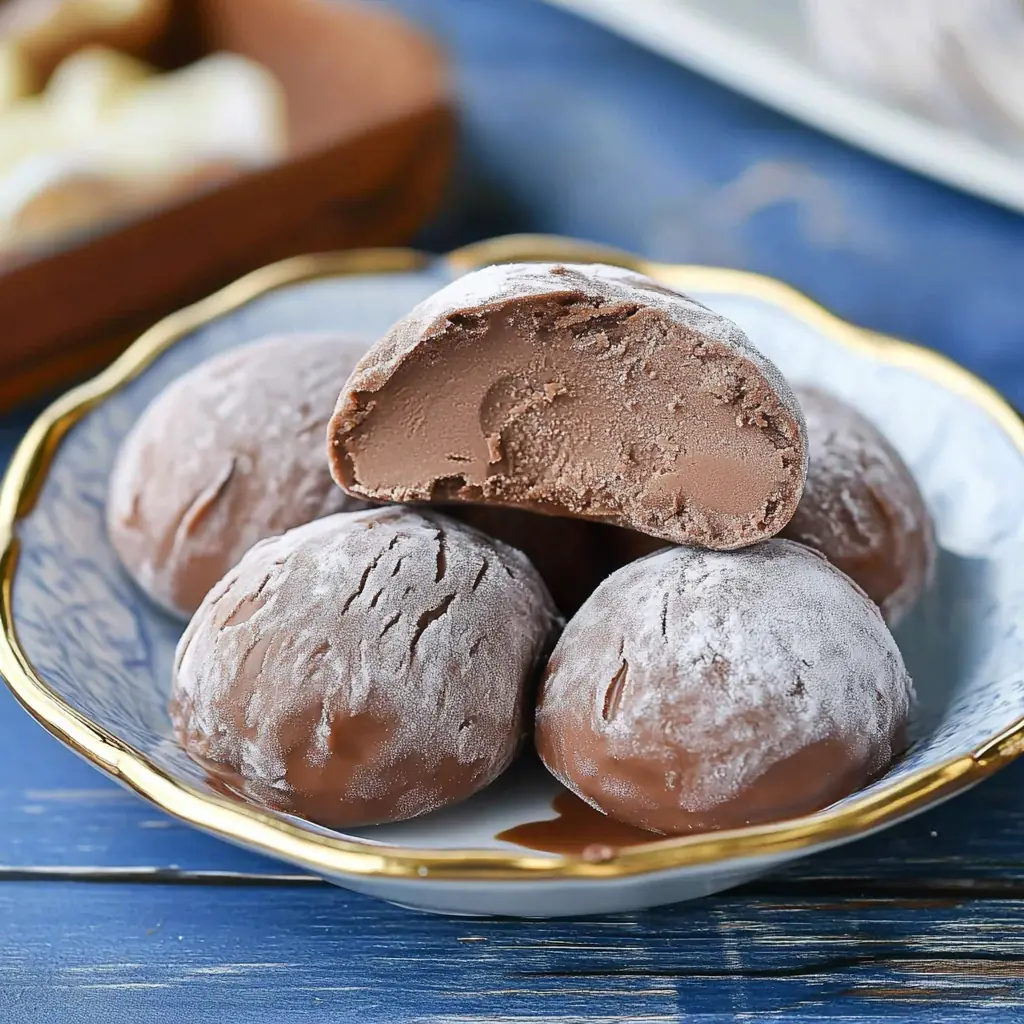
I’ve always been fascinated by desserts that combine creamy textures with chewy layers. That’s exactly why I absolutely love making Chocolate Mochi Ice Cream. The first time I tried this recipe, I was amazed at how simple ingredients could create something so delightful. It instantly transported me to a Japanese street market, where such treats are incredibly popular. Every bite reminds me of that first moment when I discovered how magical this dessert can be.
Why You’ll Love This Recipe
One of the main reasons I keep coming back to this recipe is its unique texture. The soft and chewy mochi paired with rich chocolate ice cream creates an irresistible contrast. It’s a perfect dessert for hot summer days, yet it also feels indulgent enough for any festive occasion. You’ll enjoy every step of making it, and the end result is worth every minute spent.
Versatile
This recipe is wonderfully adaptable. While I use chocolate ice cream here, you can easily substitute it with other flavors like strawberry or matcha. The mochi layer can also be flavored by adjusting the cocoa or using different powders. It fits into any occasion, whether you are serving a family gathering or simply treating yourself.
Budget-Friendly
What makes this recipe even better is its affordability. The ingredients are minimal and inexpensive, yet the dessert looks and tastes like something from a high-end patisserie. You don’t need fancy equipment or exotic ingredients to create this showstopper. All it takes is a little patience and care.
Ingredients for Recipe
Here is everything you’ll need to make this delightful Chocolate Mochi Ice Cream:
-
½ cup Glutinous Rice Flour: The essential ingredient for making chewy mochi.
-
⅛ cup Cocoa Powder: Adds the rich chocolate flavor to the mochi layer.
-
1 tbsp Powdered Sugar: Brings a subtle sweetness.
-
120 ml Water: Helps form the mochi dough.
-
2 cups Chocolate Ice Cream: The creamy filling inside each mochi ball.
-
¾ cup Cornstarch: Prevents sticking during shaping and rolling.
These simple ingredients come together beautifully, creating a dessert that is both elegant and comforting. You’ll be surprised how easy it is to create something so impressive with just a handful of items.
How to Make This Recipe
Making Chocolate Mochi Ice Cream at home may sound tricky, but it is actually quite straightforward. I always find the process enjoyable because it allows me to create something truly special. Let me guide you through the steps to ensure success on your first try.
Step-by-Step Instructions for Making
First, begin by preparing the ice cream. I scoop about ⅓ cup of chocolate ice cream for each mochi. It is best to use an ice cream scoop for consistent portions. Once scooped, I place each portion into a paper cup. Then, I repeat this process until I have filled six paper cups in total. After that, I freeze the ice cream for about thirty minutes. This step helps the ice cream to firm up, making it easier to wrap later.
While the ice cream is freezing, I start making the mochi dough. In a mixing bowl, I combine glutinous rice flour, cocoa powder, and powdered sugar. These ingredients create a rich, chocolate-flavored dough. Gradually, I pour in the water and mix thoroughly until smooth.
For steaming, I always wrap the steamer lid with a cloth. This prevents any condensation from dripping into the mochi mixture during cooking. I place the bowl with the mochi mixture into the steamer and steam it for around fifteen minutes. The dough becomes sticky and smooth once fully cooked.
When steaming is done, I prepare a tray by spreading plenty of cornstarch on it. This prevents the mochi from sticking. I then transfer the cooked mochi dough onto the tray, sprinkling additional cornstarch on top of it. To roll it out, I also dust my rolling pin with cornstarch, ensuring that nothing sticks.
Next, I roll the mochi dough to about two to four millimeters in thickness. For easy cutting, I use a pizza cutter and slice the dough into six equal squares, each approximately fifteen centimeters by fifteen centimeters.
Once the dough squares are ready, I remove the frozen ice cream scoops from the paper cups. I place one scoop in the center of each mochi square. Then, I gather the dough around the ice cream, carefully pulling the edges together to fully enclose the filling. I pinch the bottom firmly to seal it.
If there is any excess dough, I trim it off. Then, I wrap each mochi ice cream ball tightly with cling wrap. This helps to hold the shape and prevents freezer burns. I repeat this wrapping process for all remaining mochi balls.
Quick and Easy
One thing I love about this recipe is how quickly it comes together. Although there are several steps, most of the time involves freezing or steaming, which gives me time to clean up in between. The actual hands-on time is minimal.
Customizable
This dessert is very easy to personalize. You can swap the chocolate ice cream with other flavors such as green tea, mango, or vanilla. You could also change the cocoa powder in the dough to matcha powder for a different twist. There are endless possibilities to explore.
Crowd-Pleasing
Chocolate Mochi Ice Cream always surprises my guests. Its chewy exterior and creamy, cold center make it a unique and delightful treat. Everyone loves the texture and flavor combination. It is perfect for parties, family gatherings, or simply enjoying on your own.
After making this recipe a few times, you will notice how simple it really is. Every bite feels rewarding, and your guests will surely be impressed by your homemade mochi ice cream.
FAQs
Can I use other ice cream flavors for this recipe?
Yes, you absolutely can. This recipe works well with many ice cream flavors such as vanilla, strawberry, or even green tea. The process stays the same.
How do I prevent the mochi dough from sticking?
To prevent sticking, always use plenty of cornstarch. Dust your tray, rolling pin, and hands generously. This step is essential for easy handling.
Can I make this recipe ahead of time?
Yes, you can prepare Chocolate Mochi Ice Cream in advance. Once wrapped, store the mochi ice cream in the freezer. It keeps well for several days.
How long should I freeze the mochi ice cream before serving?
After wrapping, freeze the mochi ice cream for at least two hours. This ensures that the ice cream stays firm and the mochi has a perfect texture.
Is it possible to make this recipe without a steamer?
If you do not have a steamer, you can also microwave the mochi dough in short bursts, but steaming is highly recommended for the best results.
Print
Chocolate Mochi Ice Cream
This Chocolate Mochi Ice Cream recipe blends chewy chocolate-flavored mochi with creamy chocolate ice cream. It is a simple yet impressive dessert that is both satisfying and fun to make.
- Total Time: 30 minutes
- Yield: 6 pieces 1x
Ingredients
-
½ cup Glutinous Rice Flour
-
⅛ cup Cocoa Powder
-
1 tbsp Powdered Sugar
-
120 ml Water
-
2 cups Chocolate Ice Cream
-
¾ cup Cornstarch
Instructions
-
Scoop about ⅓ cup of chocolate ice cream into each paper cup. Prepare six scoops in total.
-
Freeze the scoops for thirty minutes.
-
In a bowl, combine glutinous rice flour, cocoa powder, and powdered sugar. Mix well.
-
Gradually add water, stirring until smooth.
-
Wrap the steamer lid with a cloth to prevent condensation from dripping.
-
Steam the mochi mixture for fifteen minutes.
-
Spread cornstarch over a tray.
-
Transfer the cooked mochi onto the tray and dust the top with more cornstarch.
-
Dust a rolling pin with cornstarch and roll out the mochi dough to about 2-4 mm thick.
-
Cut the dough into six squares, each about 15 cm x 15 cm.
-
Remove the ice cream from the paper cups and place each scoop onto a dough square.
-
Gather the dough edges around the ice cream, pinching at the base to seal.
-
Trim any excess dough and wrap each mochi ball tightly with cling wrap.
-
Freeze the wrapped mochi balls until firm.
-
Serve straight from the freezer when ready.
Notes
Always use plenty of cornstarch to prevent sticking during rolling and shaping. Mochi ice cream is best enjoyed shortly after freezing for optimal texture.
- Prep Time: 15 minutes
- Cook Time: 15 minutes