

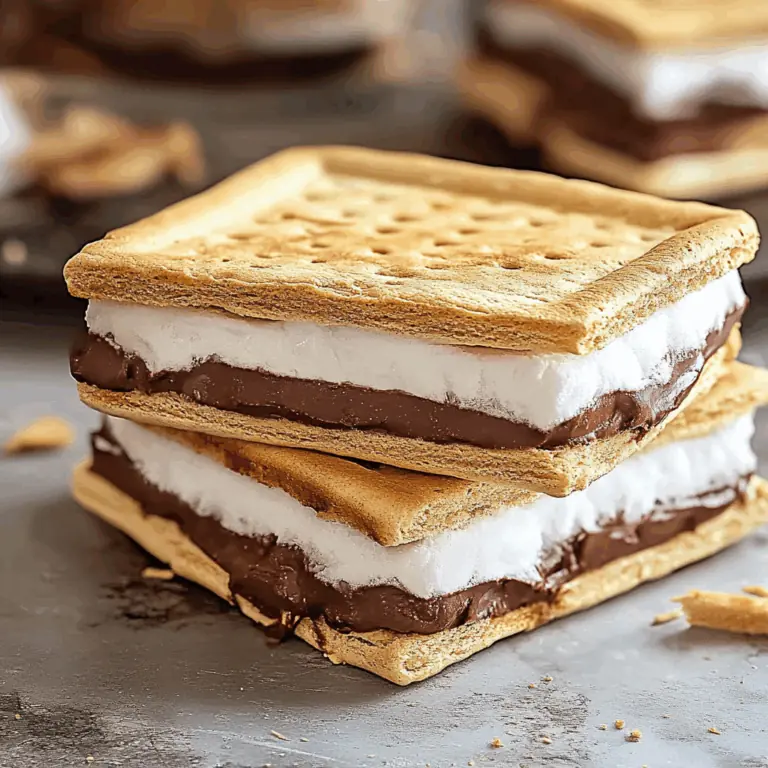
I still remember the first time I made Frozen S’mores. It was one of those hot summer days when the heat practically begged for a chilled dessert. I didn’t feel like turning on the oven, yet I craved that nostalgic campfire taste of melted chocolate, toasty marshmallows, and crispy graham crackers. So, I opened my pantry, grabbed the essentials, and decided to improvise. What came out of it? A chilled, creamy, chocolaty treat that instantly transported me back to those summer nights by the fire—without the smoke or the mess.
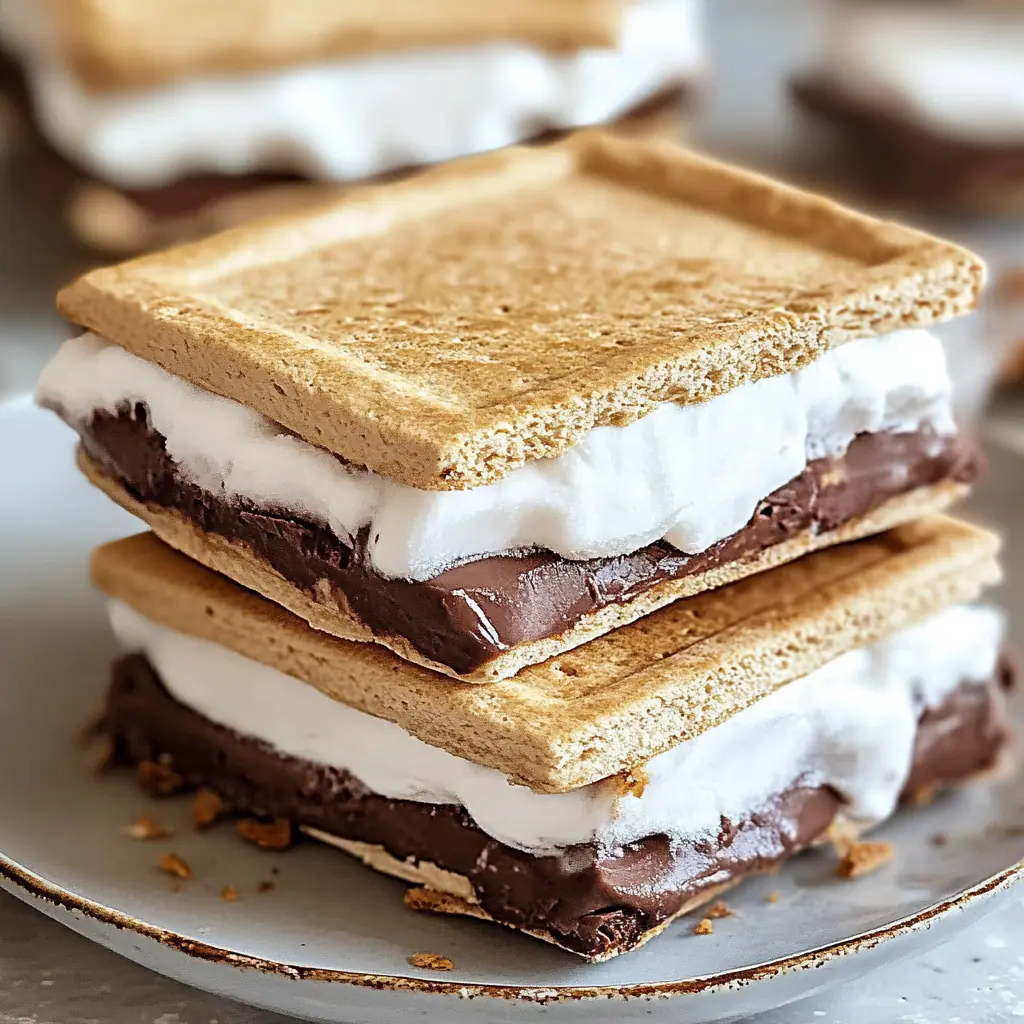
What makes these Frozen S’mores so special is how effortlessly they come together. There’s no baking involved, which means no extra heat in the kitchen. You simply layer up the ingredients, freeze, and enjoy. Each bite is filled with smooth chocolate chips, pillowy marshmallow cream, and the light crunch of graham cracker crumbs. Plus, you can make a whole batch ahead of time and just pull it out when guests arrive. Talk about easy!
Why You’ll Love This Recipe
First off, it’s downright delicious. The layers melt in your mouth and offer just the right balance of sweet and creamy. It feels indulgent, but the process is so simple that even a beginner can get it right on the first try. Best of all, you don’t need a long list of complicated ingredients or tools.
Versatile
This dessert is highly adaptable. Want to add a little crunch? Stir in some chopped nuts or flavored chocolate chips. Need to make it dairy-free? Use plant-based whipped topping and vegan marshmallow cream. Want it extra chocolaty? Swap in dark chocolate chips or drizzle melted chocolate between the layers. It’s a base recipe that invites creativity.
Budget-Friendly
With just a handful of everyday ingredients, this recipe won’t stretch your wallet. You probably already have most of the components in your pantry or fridge. Even if you need to grab one or two items from the store, it’s still one of the most affordable sweet treats to prepare.
Ingredients for Frozen S’mores
-
6 graham crackers
-
1 cup marshmallow cream
-
1 cup semi-sweet chocolate chips
-
1 cup whipped topping
These four ingredients are all you need to create a no-fuss, crowd-pleasing dessert. Whether you’re preparing for a picnic, a barbecue, or just treating yourself, Frozen S’mores deliver that perfect mix of fun and flavor.
How to Make This Recipe
Preparing Frozen S’mores is so easy that you’ll wonder why you didn’t try it sooner. There’s no baking, no stovetop cooking—just simple layering and freezing. This dessert is perfect for busy days, summer afternoons, or when you’re craving something cool and sweet without any hassle.
Let’s walk through the process step by step so you can get the texture, layers, and flavor just right.
Step-by-Step Instructions for Making
-
Line Your Pan
Begin by lining an 8×8 inch baking dish with parchment paper. This step makes it incredibly easy to lift out the dessert after freezing. Don’t skip it—it’s the key to clean cuts later. -
Crush the Graham Crackers
Take your graham crackers and crush them into fine crumbs. You can do this using a food processor or simply place them in a sealed bag and use a rolling pin. You want them finely crushed, almost like sand, so they mix well and form smooth layers. -
Mix the First Layer
In a mixing bowl, combine the graham cracker crumbs with half of the whipped topping and all of the marshmallow cream. Stir until the mixture is uniform. It will be slightly sticky but spreadable. This becomes your base. -
Layering Begins
Spread half of the cracker-marshmallow mixture evenly into the lined baking dish. Use the back of a spoon or a spatula to press it flat and smooth. Then sprinkle half of the chocolate chips across the top. -
Add Whipped Topping and Repeat
Now spread a layer of whipped topping over the chocolate chips. Try to keep it smooth and even. If you want thicker layers, use generous amounts. Then repeat the previous steps: add the remaining cracker-marshmallow mixture, sprinkle the rest of the chocolate chips, and finish with another whipped topping layer. -
Freeze Until Firm
Once everything is layered, cover the dish tightly with plastic wrap or foil. Place it in the freezer and leave it for at least 4 hours—or better yet, overnight. The longer it freezes, the firmer and cleaner your slices will be. -
Slice and Serve
To serve, lift the dessert out of the pan using the parchment paper. Place it on a cutting board and slice into squares. For cleaner cuts, dip your knife in hot water between slices. Serve immediately for the best texture.
Quick and Easy
With just 15 minutes of active preparation time, this dessert fits perfectly into any schedule. The freezer does most of the work. There’s no need for fancy kitchen tools or complex techniques. Just mix, layer, freeze, and enjoy.
Customizable
Want to make it your own? Try using chocolate graham crackers instead of regular. You could also add a swirl of peanut butter between the layers or top with crushed freeze-dried strawberries for a fruity finish. For a vegan version, substitute the whipped topping and marshmallow cream with plant-based alternatives and choose dairy-free chocolate chips.
This recipe also adapts well to different serving sizes. Double the quantities for a 9×13 inch dish if you’re feeding a crowd. Or halve the ingredients for a smaller batch.
Crowd-Pleasing
Frozen S’mores are always a hit, whether you’re serving kids, adults, or a mix of both. The layers are visually appealing, the flavor is nostalgic, and the texture is creamy and satisfying. They also travel well if kept cold, making them a great choice for potlucks, birthday parties, and BBQs.
Guests will be impressed by how the simple combination of marshmallow, chocolate, and graham crackers can feel so luxurious when served frozen. Many people associate s’mores with summer camping, so this chilled version brings back memories while offering something fresh and new.
No matter the occasion, this no-bake treat is guaranteed to disappear quickly. You might even want to make a double batch just to be safe!
FAQs
Can I use homemade whipped topping?
Yes, you can use homemade whipped cream if you prefer. However, make sure it’s stabilized with vegan gelatin or a similar thickening agent so it holds up well during freezing.
How long do Frozen S’mores last in the freezer?
They stay fresh for up to 1 week when stored in an airtight container. After that, the texture may begin to change slightly, but they’ll still be safe to eat.
Can I make these dairy-free?
Absolutely! Simply use dairy-free whipped topping, vegan marshmallow cream, and dairy-free chocolate chips. The results are still creamy and delicious.
Do I need to thaw them before serving?
Not really. They’re meant to be eaten straight from the freezer. If they seem too firm, let them sit at room temperature for 2–3 minutes before slicing and serving.
Can I add anything extra to the recipe?
Definitely. Crushed nuts, flavored chocolate chips, or even cookie pieces make great additions. Just make sure any extra layers are spread thin so the dessert still freezes evenly.
Is there a gluten-free option?
Yes, just use gluten-free graham crackers. All other ingredients are typically gluten-free, but check labels to be sure.
Frozen S’mores
Frozen S’mores are a no-bake, summer-ready twist on the classic campfire treat. With layers of marshmallow cream, whipped topping, chocolate chips, and graham crackers, this chilled dessert is both nostalgic and refreshing. Perfect for parties or quick family treats, it’s easy to make and freezer-friendly.
- Total Time: 15 minutes
- Yield: 9 servings 1x
Ingredients
-
6 graham crackers
-
1 cup marshmallow cream
-
1 cup semi-sweet chocolate chips
-
1 cup whipped topping
Instructions
-
Line an 8×8 inch baking dish with parchment paper.
-
Crush the graham crackers into fine crumbs using a food processor or rolling pin.
-
In a bowl, combine the graham cracker crumbs with half of the whipped topping and the marshmallow cream. Stir until smooth.
-
Spread half of this mixture into the bottom of the prepared pan.
-
Sprinkle with half of the chocolate chips.
-
Spread a layer of whipped topping over the chocolate chips.
-
Repeat the layers: add the remaining graham-marshmallow mixture, sprinkle the rest of the chocolate chips, and finish with a final whipped topping layer.
-
Cover the pan tightly and freeze for at least 4 hours, or overnight for best results.
-
To serve, lift the dessert out of the pan using the parchment paper, slice into squares, and serve immediately.
-
For clean slices, dip your knife in hot water between cuts.
Notes
-
Use flavored chocolate chips or crushed nuts for variation.
-
Vegan and dairy-free options work well with substitutions.
-
Chill mixing tools to help maintain texture.
-
For smaller servings, cut into bite-sized squares.
- Prep Time: 15 minutes