
When I think of Halloween, I always picture laughter, costumes, and a table full of spooky yet delicious treats. One of my favorite recipes to prepare during this magical season is my Halloween Witch Hat Cookies. The first time I made them, my kitchen turned into a little creative workshop—sprinkles everywhere, cones lined up like tiny hats, and the air filled with the sweet smell of chocolate. It’s a recipe that never fails to bring out the fun side of baking, especially when kids are involved.
These cookies are not only adorable but also incredibly simple to make. I love how they combine playful creativity with a rich chocolate flavor that pleases everyone, from tiny trick-or-treaters to grown-up party guests. The sugar cones turned into witch hats, paired with colorful icing, make each cookie a delightful piece of edible art. Plus, they’re light, crispy, and sweet—everything a Halloween dessert should be.
Why You’ll Love This Recipe
You’ll adore this recipe because it’s fun, festive, and full of flavor. It’s the perfect way to bring a little magic to your Halloween celebrations. Whether you’re hosting a spooky party or baking for your family, these cookies will stand out on any dessert table.
Versatile
One of the best things about these cookies is how versatile they are. You can experiment with different icing colors to match your Halloween theme—think eerie green, ghostly white, or midnight blue. You can also decorate them with edible glitter or candy eyes for extra charm. Kids love adding their own twist, and every cookie turns out unique.
Budget-Friendly
Another reason I love making these cookies is how affordable they are. Most of the ingredients—like sugar cones, cake mix, and icing—are inexpensive and easy to find. You can even use store-bought cookies as the base, which saves time without compromising flavor. It’s a creative yet low-cost way to make Halloween feel special.
Ingredients for the Recipe
-
Favorite Cake Mix or Wilton’s Chocolate Cake Recipe
-
Store-Bought Chocolate Cookies or Wilton’s Cookie Recipe
-
Lemon Yellow Icing Color
-
Black Color Mist Food Coloring Spray
-
Rose Icing Color (Pink Food Coloring)
-
Violet Icing Color (Gel Food Coloring)
-
Golden Yellow Icing Color
-
Orange Icing Color
-
Sugar Cones
-
Creamy White Decorator Icing (4 lb. Tub)
Each ingredient plays a role in making these cookies stand out—bright colors, rich flavor, and that perfect Halloween look.
How to Make Halloween Witch Hat Cookies
When I start making these Halloween Witch Hat Cookies, I always prepare my kitchen for some colorful fun. The process is easy and enjoyable, especially because every step feels like a creative art project. From baking the cones to tinting the icing, this recipe turns ordinary ingredients into a festive treat.
Step-by-Step Instructions for Making
Step 1: Prepare and Bake the Cones
First, I prepare the cake mix according to the package directions or using Wilton’s chocolate cake recipe if I want a richer flavor. Then, I place my Cupcake Cones Baking Rack on a cookie sheet. This rack helps the cones stay upright during baking. Next, I fill each sugar cone with about two tablespoons of cake batter. I make sure not to overfill them to avoid spilling while baking. After that, I bake the cones following the timing suggested for the chosen cake recipe. Once baked, I let them cool completely before moving to the next step.
Step 2: Spray the Cones
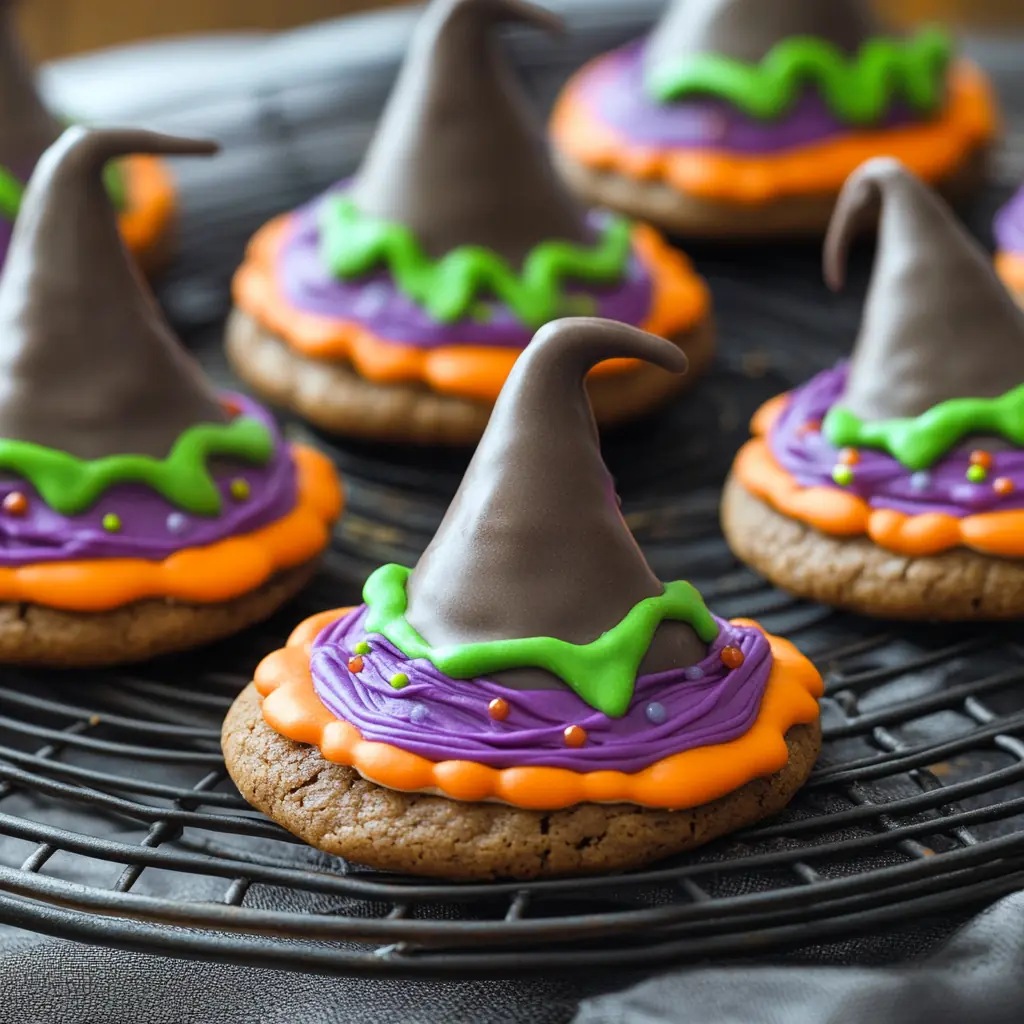
After the cones are cooled, I trim any extra cake that may have risen above the cone using a sharp knife. Then, I set them wide side down on a sheet of parchment paper. Using the Black Color Mist Food Coloring Spray, I carefully spray each cone until it’s completely covered in black. This transforms the cone into a witch hat shape. I let them dry for 10 to 15 minutes so the color sets perfectly.
Step 3: Tint the Icing and Prepare the Bags
Now comes the fun part—coloring the icing! I start by tinting one cup of creamy white decorator icing orange. Then, I tint another cup purple by mixing violet and rose icing colors. I prepare two separate decorating bags, each fitted with a tip 2B, and fill them with the orange and purple icing. Next, I tint a smaller amount (about ¼ cup) of icing yellow by combining golden yellow and lemon yellow icing colors. This yellow icing will be used for the hat buckles, so I place it in a decorating bag with tip 3 attached.
Step 4: Assemble the Witch Hats
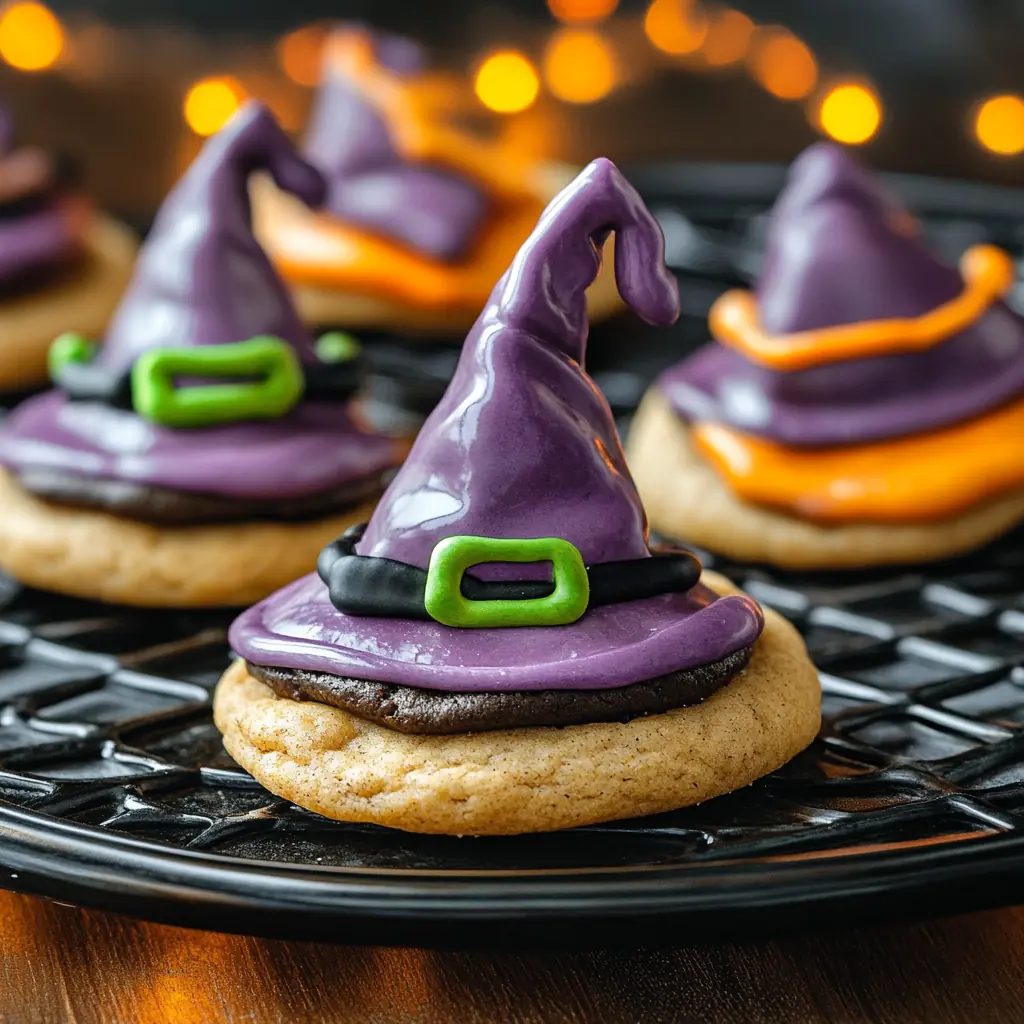
This is where everything comes together. I take a chocolate cookie and pipe a small dollop of orange icing in the center. Then, I place a cone on top so it sticks firmly. For half of the hats, I pipe a smooth orange band around the base of the cone, using the flat side of the tip outward to create an even look. I repeat the same process with purple icing for the other half of the hats. The colors look amazing together—vibrant and festive.
Once the icing bands are piped, I let them sit for about 15 to 20 minutes to firm up. Finally, I use the yellow icing bag to pipe a small square buckle around the band of each hat, giving it that signature witch hat look. After another 15 to 20 minutes of drying, the cookies are ready to serve.
Quick and Easy
The entire process might sound detailed, but it’s surprisingly simple once you begin. Most of the time is spent letting the icing dry. You can even prepare the cones ahead of time and decorate them later with family or friends.
Customizable
You can make these cookies your own by changing colors or toppings. Add edible glitter for sparkle, or tiny candy stars for a magical touch. You could even write names on the hats with icing if you want personalized treats.
Crowd-Pleasing
Whenever I bring these cookies to a Halloween party, they’re always the first to disappear. Kids love how they look, and adults can’t resist the sweet crunch of the cookie and the soft cake inside the cone. It’s a treat that combines creativity, flavor, and fun in every bite.
FAQs
1. Can I use store-bought cookies instead of homemade ones?
Yes, absolutely. Store-bought chocolate cookies work perfectly as the base for these witch hats. They save time and still give a great crunch. If you prefer a homemade touch, though, try using Wilton’s chocolate cookie recipe for a richer flavor.
2. What if I don’t have Black Color Mist?
If you can’t find the Black Color Mist, you can use black gel food coloring mixed with a tiny bit of water and brush it over the cones. It takes a few extra minutes to dry, but the result looks just as spooky and beautiful.
3. Can I make these cookies ahead of time?
Yes, you can prepare them a day or two in advance. Once they’re decorated, store them in an airtight container at room temperature. Avoid refrigerating them because moisture can make the cones soft.
4. How can I involve kids in making these cookies?
This recipe is a great Halloween activity for kids. Let them color the icing, assemble the hats, or decorate the buckles. It’s fun, messy, and full of creativity. Just be sure to supervise while they handle the food coloring.
5. Can I use other colors for the icing?
Of course! Orange, purple, and yellow are classic Halloween colors, but you can try green, black, or even silver to match your theme. The idea is to keep the cookies bright and festive.
6. My icing won’t hold its shape—what can I do?
If your icing is too soft, chill it for a few minutes or add more powdered sugar to thicken it. This helps it hold the piped designs better.
7. Can I use frosting instead of decorator icing?
Yes, frosting can work fine if it’s thick enough to pipe. However, decorator icing holds shape longer and gives a smoother finish.

Halloween Witch Hat Cookies
These Halloween Witch Hat Cookies are the ultimate festive treat for spooky celebrations. Made with sugar cones, colorful icing, and a simple cake mix, they’re fun to make, easy to customize, and guaranteed to be a hit at any Halloween party. Whether for kids or adults, these cookies bring sweetness and creativity to your dessert table.
- Total Time: 105 minutes
- Yield: 12 cookies
Ingredients
-
Favorite Cake Mix or Wilton’s Chocolate Cake Recipe
-
Store-Bought Chocolate Cookies or Wilton’s Cookie Recipe
-
Lemon Yellow Icing Color
-
Black Color Mist Food Coloring Spray
-
Rose Icing Color (Pink Food Coloring)
-
Violet Icing Color (Gel Food Coloring)
-
Golden Yellow Icing Color
-
Orange Icing Color
-
Sugar Cones
-
Creamy White Decorator Icing (4 lb. Tub)
Instructions
-
Prepare and Bake the Cones:
-
Make the cake mix according to your chosen recipe.
-
Place a Cupcake Cones Baking Rack on a cookie sheet and insert the sugar cones.
-
Fill each cone with 2 tablespoons of cake batter and bake as directed. Let them cool completely.
-
-
Spray the Cones:
-
Trim any risen cake at the top of the cones.
-
Place them wide side down on parchment paper.
-
Spray each cone with Black Color Mist and let dry for 10–15 minutes.
-
-
Tint the Icing and Prepare the Bags:
-
Tint 1 cup of icing orange, and another 1 cup purple (mix violet and rose).
-
Prepare two decorating bags with tip 2B, filling one with orange and the other with purple icing.
-
Tint ¼ cup of icing yellow (mix golden yellow and lemon yellow) and place it in a bag with tip 3 attached.
-
-
Assemble the Witch Hats:
-
Pipe a small amount of orange icing in the center of a cookie, then place a cone on top.
-
Pipe an orange band around half of the cones and a purple band around the rest.
-
Let them set for 15–20 minutes.
-
Use yellow icing to pipe a buckle on each hat. Let them set again for 15–20 minutes before serving.
-
Notes
-
Store cookies in an airtight container at room temperature.
-
You can customize icing colors to match your Halloween theme.
-
Avoid refrigerating to keep cones crisp.
-
Great for parties or edible gifts.
- Prep Time: 45 minutes
- Cook Time: 60 minutes