
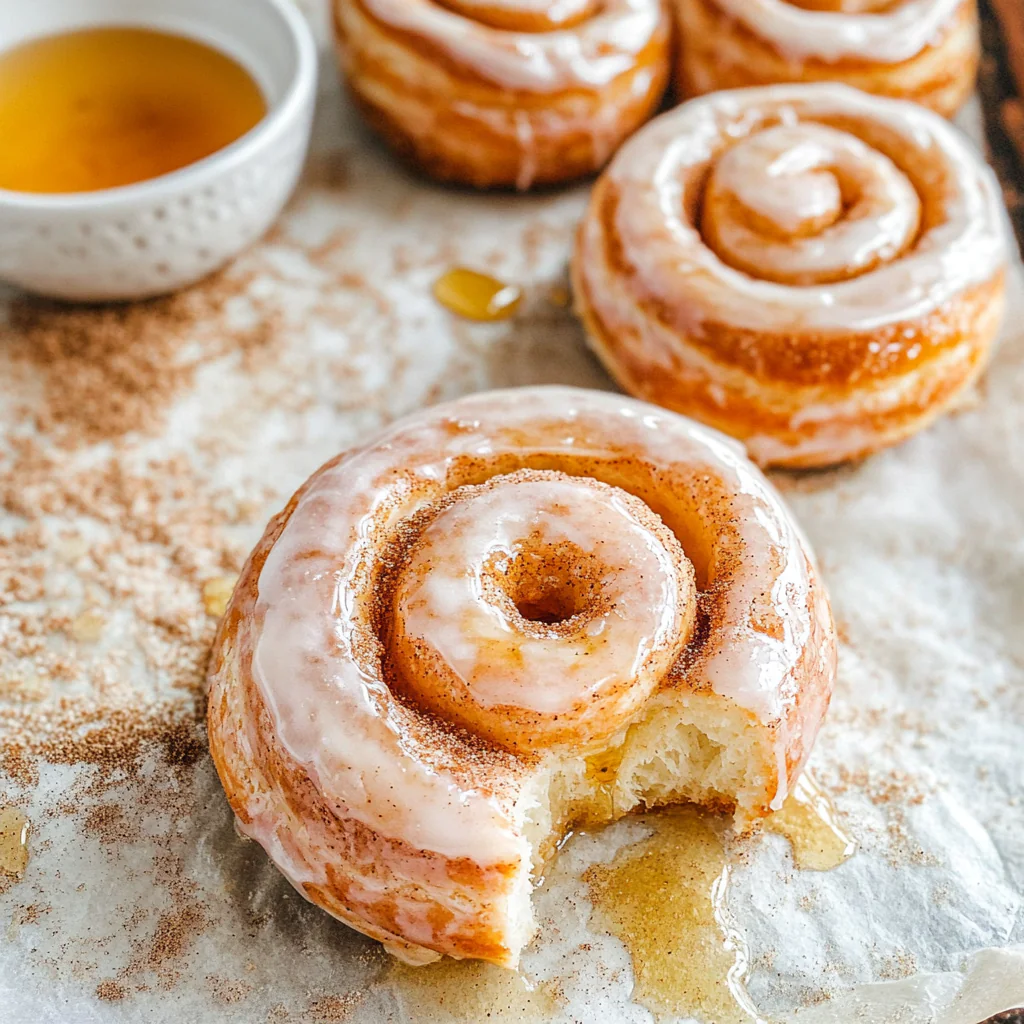
There’s nothing quite like the warm, sweet aroma of freshly made honey buns filling the kitchen. These golden, fluffy pastries are soft on the inside, slightly crisp on the outside, and coated in a smooth honey glaze that melts in your mouth. Whether you enjoy them for breakfast, as a snack, or as a special homemade treat, these honey buns are guaranteed to satisfy your sweet cravings.
Soft, Sweet, and Perfectly Glazed
Making honey buns from scratch may sound like a challenge, but with a little patience and the right technique, you can achieve bakery-quality results right at home. The dough is lightly sweetened with honey, creating a rich, tender texture. A touch of cinnamon sugar inside adds a warm, cozy flavor, while frying them to golden perfection gives them their signature crisp yet soft bite.
Once the honey buns are fried, they take a quick dip in a luscious glaze made with powdered sugar, honey, vanilla, and butter. The result? A glossy, lightly crisp coating that locks in moisture and enhances every bite. These homemade honey buns are perfect for weekend baking, special occasions, or simply when you’re craving something irresistibly sweet.
Not only do they taste incredible fresh, but they also store well, making them a great make-ahead option. Serve them with a cup of coffee or tea, and you’ve got a homemade treat that’s better than anything you can buy at the store.
Let’s dive into the ingredients and steps to make these delicious honey buns at home.
Ingredients for Homemade Honey Buns
To make these soft, golden honey buns, you’ll need a combination of simple pantry staples and a few key ingredients that bring out their rich flavor and texture.
Dough:
- ½ cup warm water – Activates the yeast and helps create a soft dough.
- 3 tablespoons granulated sugar – Adds sweetness and helps feed the yeast.
- 1 tablespoon active yeast – Provides the necessary rise and structure.
- 2 ⅔ cups all-purpose flour – The base for a soft yet sturdy dough.
- ⅓ cup honey – Enhances the natural sweetness and creates a rich flavor.
- ¼ cup shortening (melted) – Adds moisture and tenderness.
- 3 large egg yolks – Contribute to the dough’s richness and soft texture.
- 1 teaspoon vanilla extract – Provides a subtle depth of flavor.
- ½ teaspoon salt – Balances the sweetness and enhances the dough’s structure.
For Frying:
- Vegetable oil – Needed for deep frying, ensuring a crispy golden exterior.
Cinnamon Sugar Filling:
- ¼ cup granulated sugar – Adds a touch of sweetness inside the rolls.
- 1 ½ teaspoons cinnamon – Infuses warmth and spice into each bite.
Honey Glaze:
- 4 ⅔ cups powdered sugar – Creates a smooth and sweet coating.
- 2 ½ tablespoons honey – Enhances the glaze with a natural honey flavor.
- 1 tablespoon melted butter – Adds richness and a slight sheen.
- ½ teaspoon vanilla extract – Complements the honey with a warm, aromatic touch.
- ¼ teaspoon salt – Balances the sweetness.
- Warm water (as needed) – Helps adjust the glaze to the perfect consistency.
How to Make Homemade Honey Buns
Making honey buns from scratch takes a bit of time, but the results are absolutely worth it. Follow these steps for the perfect balance of softness, sweetness, and crispness.
Step 1: Prepare the Dough
In the bowl of a stand mixer fitted with a whisk attachment, combine warm water, 2 teaspoons of sugar, and yeast. Whisk together until just combined, then let it sit for 5 minutes until the mixture becomes frothy. This step activates the yeast, ensuring the dough rises properly.
Step 2: Knead the Dough
Swap the whisk attachment for a dough hook. Add the remaining sugar, flour, honey, melted shortening, egg yolks, vanilla, and salt. Knead on medium speed for about 8 minutes. The dough should be sticky but smooth. When stretched, it should hold together and be slightly transparent without tearing.
Step 3: Let the Dough Rise
Transfer the dough to a clean, lightly greased bowl. Cover with plastic wrap or a clean kitchen towel and let it rise for 1 hour, or until doubled in size.
Step 4: Prepare the Cinnamon Sugar
While the dough is rising, whisk together the cinnamon and granulated sugar in a small bowl. This mixture will be sprinkled inside the honey buns for added flavor.
Step 5: Shape the Honey Buns
Once the dough has risen, turn it out onto a lightly floured surface. Roll it into a 12-inch by 8-inch rectangle. Sprinkle the cinnamon sugar evenly over the surface, then gently press it into the dough.
Roll the dough tightly from the long side to form a log. Turn the roll diagonally and use a knife to score 8 equal pieces. Trim the ends and cut the scored sections to create oblong-shaped pieces. Arrange them on a parchment-lined baking sheet, leaving at least 2 inches of space between each bun. Lightly press them down with your fingers.
Step 6: Second Rise
Cover the shaped buns loosely and let them rise for 45 minutes. They should puff up slightly but not double in size.
Step 7: Heat the Oil
While the buns are rising, pour vegetable oil into a large pan or stockpot. Heat it over medium heat until the oil reaches 365°F (185°C).
Step 8: Fry the Honey Buns
Once risen, gently press the buns down again before frying. Carefully place a few buns at a time into the hot oil. Fry for 90 seconds per side, flipping once, until golden brown.
Transfer the fried buns to a wire cooling rack set over a paper towel-lined baking sheet to drain excess oil.
Step 9: Make the Glaze
In a medium-sized bowl, whisk together the powdered sugar, honey, melted butter, vanilla, and salt. Add warm water gradually (about ⅓ to ½ cup) until the glaze reaches the desired consistency—smooth and slightly runny.
Step 10: Glaze the Honey Buns
While still warm, dip each fried honey bun into the glaze, ensuring a generous coating. Let them rest on the cooling rack until the glaze sets.
Step 11: Serve and Enjoy
Enjoy these homemade honey buns warm for the best texture and flavor.
How Long to Fry Honey Buns
The frying time for honey buns is crucial to achieving the perfect golden-brown exterior while keeping the inside soft and fluffy. Since honey buns are fried instead of baked, they cook relatively quickly, but the right temperature and timing are essential to avoid undercooking or overbrowning.
Here’s a general guide for frying honey buns at 365°F (185°C):
- Small honey buns – Fry for 75–90 seconds per side
- Medium honey buns – Fry for 90 seconds per side
- Large honey buns – Fry for 100–120 seconds per side
The best way to tell if your honey buns are done is to look for an even golden-brown color on both sides. The exterior should feel crisp but not overly hard, while the inside should remain soft and fluffy. Always monitor the oil temperature with a kitchen thermometer, as fluctuating heat can affect the texture of the honey buns.
How to Store Leftover Honey Buns
If you have extra honey buns, you can easily store them to enjoy later. While they taste best fresh, proper storage ensures they remain soft and flavorful.
Refrigerator Storage:
- Place cooled honey buns in an airtight container or wrap them individually in plastic wrap.
- Store them in the refrigerator for up to 4 days.
- When ready to eat, warm them in the microwave for 10–15 seconds or in a low-temperature oven at 300°F (150°C) for 5 minutes.
Freezer Storage:
- Wrap each honey bun individually in plastic wrap, then place them in a freezer-safe bag or container.
- Store in the freezer for up to 1 month.
- To reheat, let them thaw in the refrigerator overnight, then warm in the oven or microwave before serving.
Best Way to Keep Them Fresh
- Avoid refrigerating unless necessary, as this can dry them out.
- Store at room temperature in an airtight container for up to 2 days if you plan to eat them soon.
- Reheat properly before serving to restore their soft texture.
Tips for Perfect Honey Buns
Making the best honey buns requires a balance of the right ingredients, techniques, and attention to detail. Here are some tips to ensure they turn out perfectly every time:
Choosing the Right Dough Texture
- The dough should be slightly sticky but still hold its shape. If it’s too dry, add a teaspoon of warm water at a time until the right consistency is reached.
- Knead the dough until smooth and elastic for the softest texture.
Getting the Best Frying Results
- Use a thermometer to keep the oil at 365°F (185°C). If the oil is too hot, the buns will brown too quickly without cooking through. If too cool, they’ll absorb excess oil and become greasy.
- Don’t overcrowd the pan. Fry in small batches to maintain consistent heat.
Perfecting the Honey Glaze
- For a thicker glaze, use less water when mixing.
- For a lighter glaze, add a few extra teaspoons of warm water to thin it out.
- Dip the honey buns while they’re still warm so the glaze coats them evenly and sets properly.
Flavor Enhancements
- Add a pinch of nutmeg or extra cinnamon for a richer taste.
- Sprinkle crushed nuts (such as walnuts or almonds) over the glaze for added crunch.
- Swap the honey glaze with a vanilla or cream cheese glaze for a different flavor twist.

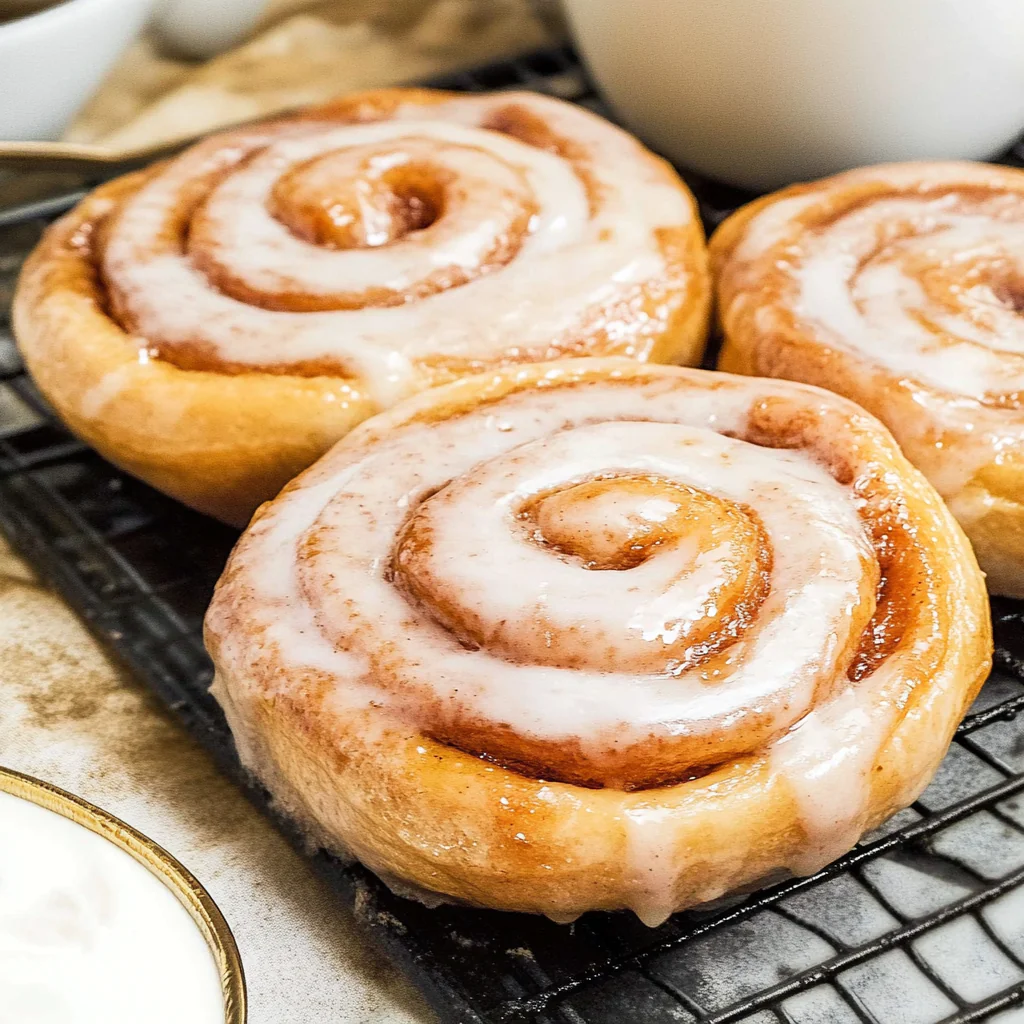
Homemade Honey Buns
These Homemade Honey Buns are a delightful treat that’s perfect for any occasion. With their fluffy interior and crispy exterior, they’re dipped in a sweet honey glaze for an irresistible finish. Whether you’re serving them as a dessert or a snack, these honey buns are sure to impress!
- Total Time: 1 hour 15 minutes
- Yield: 12 honey buns 1x
Ingredients
- 1/2 cup warm water
- 3 tablespoons granulated sugar
- 1 tablespoon active yeast
- 2 2/3 cups all-purpose flour
- 1/3 cup honey
- 1/4 cup shortening (melted)
- 3 large egg yolks
- 1 teaspoon vanilla extract
- 1/2 teaspoon salt
- Vegetable oil (for frying)
- 1/4 cup granulated sugar
- 1 1/2 teaspoon cinnamon
- 4 2/3 cups powdered sugar
- 2 1/2 tablespoons honey
- 1 tablespoon melted butter
- 1/2 teaspoon vanilla extract
- 1/4 teaspoon salt
- Warm water (as needed)
Instructions
- In the bowl of a stand mixer fitted with a whisk attachment, combine warm water, 2 teaspoons of sugar, and yeast. Whisk together until just combined, then let sit for 5 minutes, until frothy.
- Swap the attachment to a dough hook and add the remaining sugar, flour, honey, shortening, egg yolks, vanilla, and salt. Knead on medium speed for 8 minutes. The dough should be slightly sticky but hold its shape when stretched.
- Transfer the dough to a lightly sprayed bowl, cover with plastic wrap or a clean kitchen towel, and let rise for 1 hour until doubled in size.
- While the dough rises, make the cinnamon sugar by whisking together the cinnamon and sugar.
- Once the dough has risen, turn it out onto a floured surface and roll it out to 12” long and 8” wide. Dust with the cinnamon sugar and gently press it into the dough.
- Roll the dough up from the long side, then turn the roll diagonally. Score the dough into 8 equal pieces. Cut off the ends (about 1 1/2”) and then cut the scored pieces. Place each piece on a parchment-lined baking sheet, leaving at least 2” of space between them. Press and lightly shape each piece with your fingers, then let rise for about 45 minutes.
- Meanwhile, heat vegetable oil in a large pan or stockpot over medium heat to 365°F.
- Once the rolls have risen, gently press them down again and fry them in small batches, for about 90 seconds per side, until golden brown.
- While the buns are frying, make the glaze by whisking together powdered sugar, honey, melted butter, vanilla, and salt. Gradually add warm water to achieve your desired glaze consistency.
- Once golden brown, remove the honey buns from the oil and place them on a wire cooling rack over a paper towel-lined baking sheet. Gently press them down and immediately dip them into the glaze.
- Repeat the frying process with the remaining honey buns.
Notes
- For added crunch, sprinkle crushed nuts like walnuts or almonds over the buns before frying.
- Leftover honey buns can be stored in an airtight container at room temperature for up to 2 days. Reheat in the microwave or oven before serving.
- For a different flavor, substitute the honey glaze with vanilla or cream cheese glaze.
- Prep Time: 60 minutes
- Cook Time: 15 minutes
Frequently Asked Questions
1. Can I make the dough ahead of time?
Yes, you can make the dough ahead of time! After kneading the dough, cover it tightly with plastic wrap and refrigerate it for up to 24 hours. When you’re ready to fry the honey buns, let the dough come to room temperature before proceeding with the rising and shaping steps. This will help maintain its texture and rise properly.
2. Can I bake the honey buns instead of frying them?
While frying gives honey buns their signature crispy exterior, you can bake them as an alternative. To bake, preheat the oven to 350°F (175°C), then place the shaped buns on a parchment-lined baking sheet with a little space between each one. Bake for 15–20 minutes or until they are golden brown. The result will be a less crispy exterior but still delicious.
3. What can I use instead of shortening?
If you prefer not to use shortening, you can substitute it with unsalted butter or vegetable oil. Butter will add a richer flavor to the dough, while vegetable oil will maintain a similar texture and result. Keep in mind that shortening helps the buns stay soft, so if you substitute, the texture may be slightly different.
4. How can I make the honey buns less sweet?
To reduce the sweetness of the honey buns, you can decrease the amount of honey in the dough and glaze. You can also skip the cinnamon sugar filling or use a smaller amount. For the glaze, consider using a blend of powdered sugar and a bit of milk or cream for a less intense sweetness.