
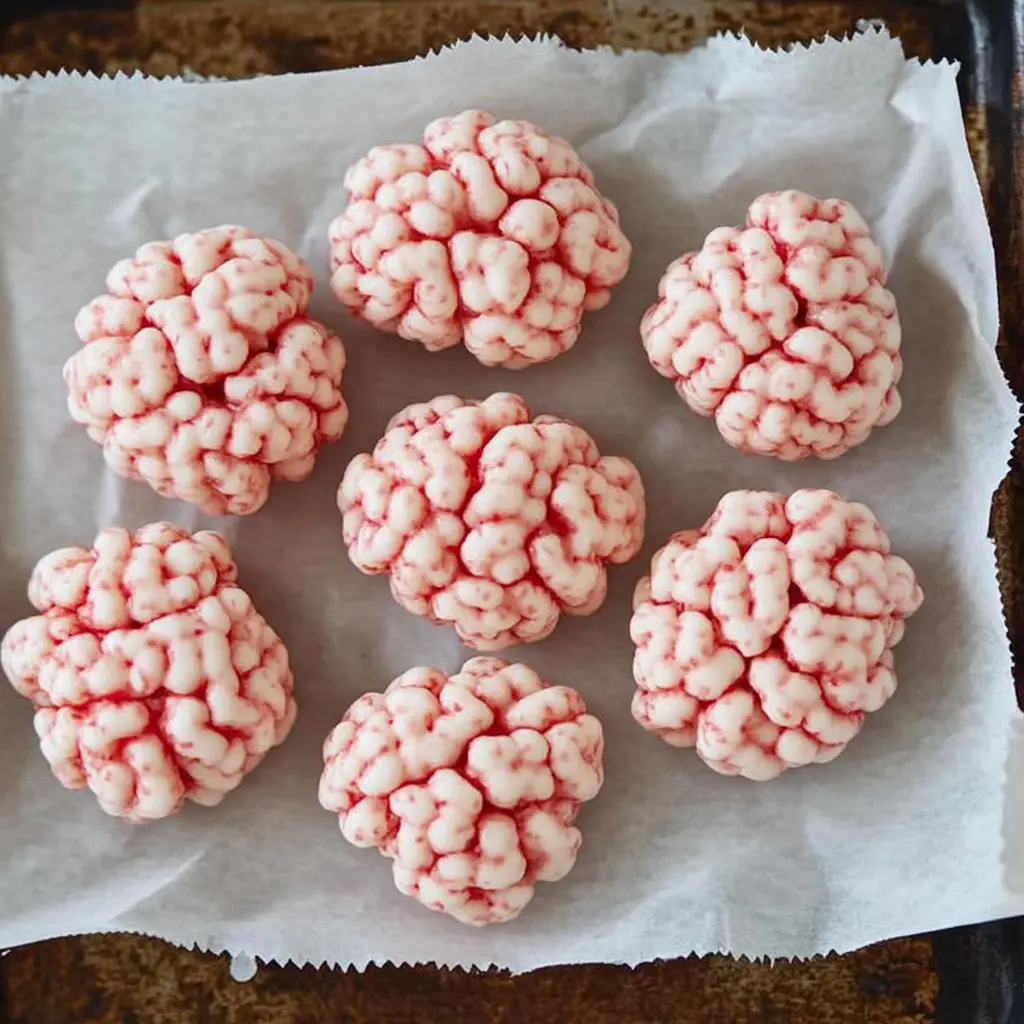
When Halloween approaches, I always look for creative ways to make spooky treats without spending hours in the kitchen. This year, I wanted something fun, sweet, and easy enough for kids to join in. That’s how my Marshmallow Rice Bubbles Halloween Brains came to life! I still remember the first time I made them; the look on everyone’s face when they saw those creepy little “brains” was priceless. They were both gross and delicious — exactly the kind of mix that makes Halloween desserts so exciting.
These treats are incredibly simple to make, and they bring a lot of laughter to the table. The combination of chewy marshmallows and crispy Rice Bubbles creates a texture that’s both soft and crunchy. Once shaped into brain-like ovals and decorated with red “veins,” they become the perfect Halloween snack for parties, trick-or-treat gatherings, or a fun weekend activity with family.
Why You’ll Love This Recipe
You’ll love this recipe because it’s easy, quick, and always a hit with both kids and adults. There’s no need for baking, no complicated steps, and you only need a few basic ingredients. Plus, you can prepare them ahead of time and store them in an airtight container for several days.
The process is as fun as the result — melting marshmallows, mixing, and shaping the brains feels like a mini craft project in the kitchen. They look spooky but taste heavenly. Whether you’re planning a Halloween party or simply want to surprise your kids with something playful, these marshmallow brains are sure to make everyone smile.
Versatile
The beauty of this recipe lies in its flexibility. You can easily adjust the size of the brains depending on how many guests you have. Add more food colouring for a bloodier look, or use different shades to create monster-like versions. You can even turn the same mixture into themed shapes like pumpkins or ghosts — just get creative with the moulding!
Budget-Friendly
Another reason I love this recipe is how affordable it is. All you need are marshmallows, butter, Rice Bubbles, and a few drops of red colouring. These simple ingredients go a long way, making it perfect for large gatherings without breaking the bank.
Ingredients
-
85 g unsalted butter
-
6 cups regular marshmallows
-
4 cups Rice Bubbles (Krispies)
-
½ tsp salt
-
red food colouring
How to Make Marshmallow Rice Bubbles Halloween Brains
Creating these spooky Halloween treats is as easy as it is entertaining. I love how this recipe comes together with just a few ingredients and a simple no-bake method. You don’t need an oven, fancy tools, or a lot of time — just a bit of patience and creativity.
Step-by-Step Instructions for Making
Step 1: Prepare your Bain-Marie
Start by setting up a Bain-Marie, also known as a double boiler. Add half a cup of water to a small pot and bring it to a gentle boil. Place a large heatproof bowl on top of the pot, making sure it sits securely without touching the water. This gentle heat helps melt the butter and marshmallows evenly without burning.Step 2: Melt the butter and marshmallows
Add the unsalted butter and regular marshmallows to the heatproof bowl. Begin whisking continuously as they start to melt. The mixture will slowly transform into a thick, smooth, and glossy paste. This part usually takes around two to four minutes, depending on the heat level. Keep whisking so that the marshmallows don’t stick or burn at the bottom.Step 3: Add colour and salt
When the mixture becomes creamy, remove the bowl carefully using oven mitts or a tea towel. Stir in the salt to balance the sweetness and add a few drops of red food colouring. Whisk it well until you achieve your desired bloody shade. You can go with light red for a subtle brain look or darker tones for a scarier effect.Step 4: Mix with Rice Bubbles
Now, in a large mixing bowl, place the Rice Bubbles. Pour the warm marshmallow mixture over them and immediately start stirring with a spatula or wooden spoon. It’s important to mix quickly before the marshmallow starts to set. Keep turning the mixture until every bit of Rice Bubble is fully coated with that sticky red sweetness.Step 5: Shape the brains
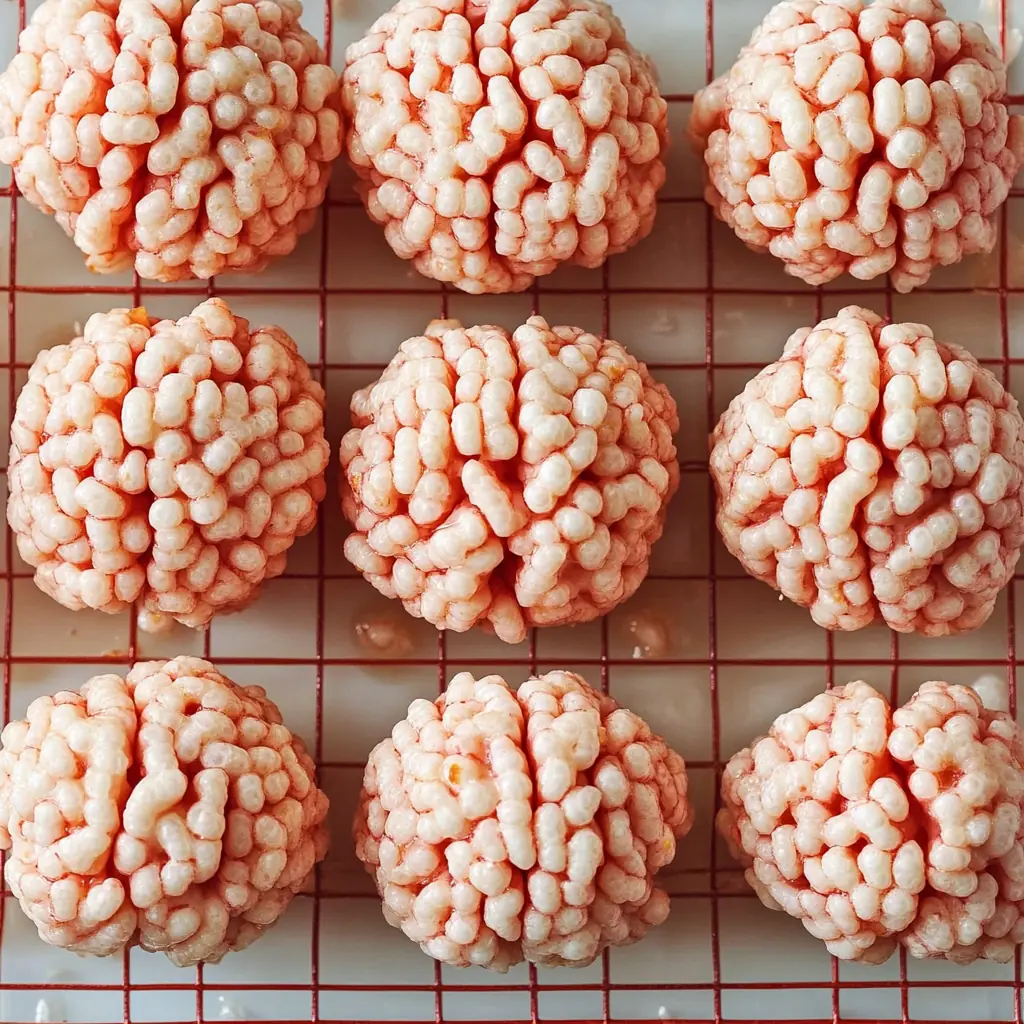
Before shaping, lightly oil your hands to prevent sticking. Take small handfuls of the mixture and roll them into oval shapes. Press gently to flatten the tops slightly, then use a butter knife to make a shallow line down the centre. This line gives the treat its signature “brain” appearance. If the mixture starts to harden, you can warm it slightly again in the bowl to make it easier to shape.Step 6: Add spooky details
Dip a toothpick into the red food colouring and carefully draw small, squiggly veins across the surface of each oval. These little details turn simple marshmallow snacks into realistic edible brains. You can let your creativity shine — make some darker, some lighter, and vary the vein patterns for a more natural effect.Step 7: Let them set and store properly
Once shaped and decorated, place the brains on a parchment-lined tray. Let them cool and firm up for at least 15 minutes at room temperature. When they’re completely set, transfer them to an airtight container. Store them in a cool, dry place for up to one week. They’ll stay chewy and fresh, ready to serve at any spooky occasion.Quick and Easy
What I love most about this recipe is that it’s incredibly quick and doesn’t require baking. The entire process, from melting to shaping, takes about twenty minutes. It’s ideal for last-minute party prep or when you want to make something festive without much effort. Plus, cleanup is minimal since you’re only using a few bowls and tools.
If you’re making them with kids, it’s a great way to spend creative time together. Kids enjoy mixing, shaping, and decorating — especially when the result looks scary yet tastes delicious.
Customizable
This recipe is wonderfully customizable. You can add extra touches to make it your own. For instance, mix in a few mini marshmallows before shaping to create a bumpy, brain-like texture. You could also add edible glitter for a magical twist or use different food colourings like green or purple for monster brains.
Want to make them healthier? Use low-sugar marshmallows and unsalted puffed rice. If you need them dairy-free, swap butter for coconut oil or vegan butter. The recipe easily adapts to dietary preferences without losing its charm.
Crowd-Pleasing
These Halloween brains are a guaranteed crowd-pleaser. They’re fun to look at, even more fun to eat, and they add a playful touch to any party table. Kids find them fascinating, and adults can’t resist their nostalgic marshmallow flavour. Whether served as part of a dessert spread or given as treats to trick-or-treaters, they’ll disappear faster than you expect.
What makes them stand out is their mix of visual appeal and taste. They perfectly balance gooey sweetness with crispy crunch, while the red veins make them irresistibly eerie. Everyone will be impressed that something so creepy-looking can taste this good!
FAQs
1. Can I use mini marshmallows instead of regular ones?
Yes, absolutely. Mini marshmallows melt faster and blend more evenly with the butter. Just use the same total amount as listed in the recipe.2. What can I use if I don’t have a Bain-Marie?
If you don’t have one, you can melt the butter and marshmallows in a non-stick saucepan on low heat. Just stir constantly to prevent burning.3. How do I keep the mixture from sticking to my hands while shaping?
Lightly oil or butter your hands before handling the mixture. This makes shaping easier and helps you achieve smooth brain shapes.4. Can I make these treats ahead of time?
Yes, you can make them a few days in advance. Store them in an airtight container at room temperature for up to a week. Avoid refrigerating, as it can make them too hard.5. Is there a way to make them vegan?
You can use vegan marshmallows and dairy-free butter. The taste and texture remain just as good, and they’ll still hold their spooky shape perfectly.
Marshmallow Rice Bubbles Halloween Brains
These Marshmallow Rice Bubbles Halloween Brains are fun, spooky, and incredibly easy to make. They combine the chewy sweetness of marshmallows with the light crunch of Rice Bubbles to create brain-shaped treats perfect for any Halloween celebration. With just a few simple ingredients and no baking required, this recipe is ideal for parties, family fun, or classroom events.
- Total Time: 20 minutes
- Yield: 14 servings 1x
Ingredients
Scale-
85 g unsalted butter
-
6 cups regular marshmallows
-
4 cups Rice Bubbles (Krispies)
-
½ tsp salt
-
red food colouring
Instructions
-
Prepare a Bain-Marie by adding ½ cup of water to a small pot and bringing it to a gentle boil. Place a large heatproof bowl over the pot.
-
Add butter and marshmallows to the bowl. Stir continuously until a smooth, thick paste forms (about 2–4 minutes).
-
Carefully remove the bowl from the pot. Add salt and a few drops of red food colouring. Whisk until the mixture turns evenly red.
-
In a large mixing bowl, pour the Rice Bubbles. Add the melted marshmallow mixture and stir until fully coated.
-
Lightly oil your hands, then shape the mixture into oval “brains.” Use a butter knife to create a line in the centre.
-
Dip a toothpick in food colouring and draw small veins for a realistic look.
-
Let the treats cool for 15 minutes, then store them in an airtight container for up to one week.
Notes
-
To prevent sticking, lightly grease your hands before shaping.
-
For a darker red tone, add more food colouring.
-
Vegan marshmallows and dairy-free butter can be used for a vegan version.
-
Avoid refrigeration to maintain a chewy texture.
- Prep Time: 20 minutes