
I’ve always loved the flavors of fall — the sweet warmth of pumpkin spice, the creamy richness of cheesecake, and the comforting aroma that fills the kitchen. That’s exactly what inspired me to make these Pumpkin Cheesecake Truffles. They bring together everything I adore about autumn desserts but in the form of a bite-sized treat. Whenever I make them, my kitchen feels like a cozy bakery filled with festive flavors.

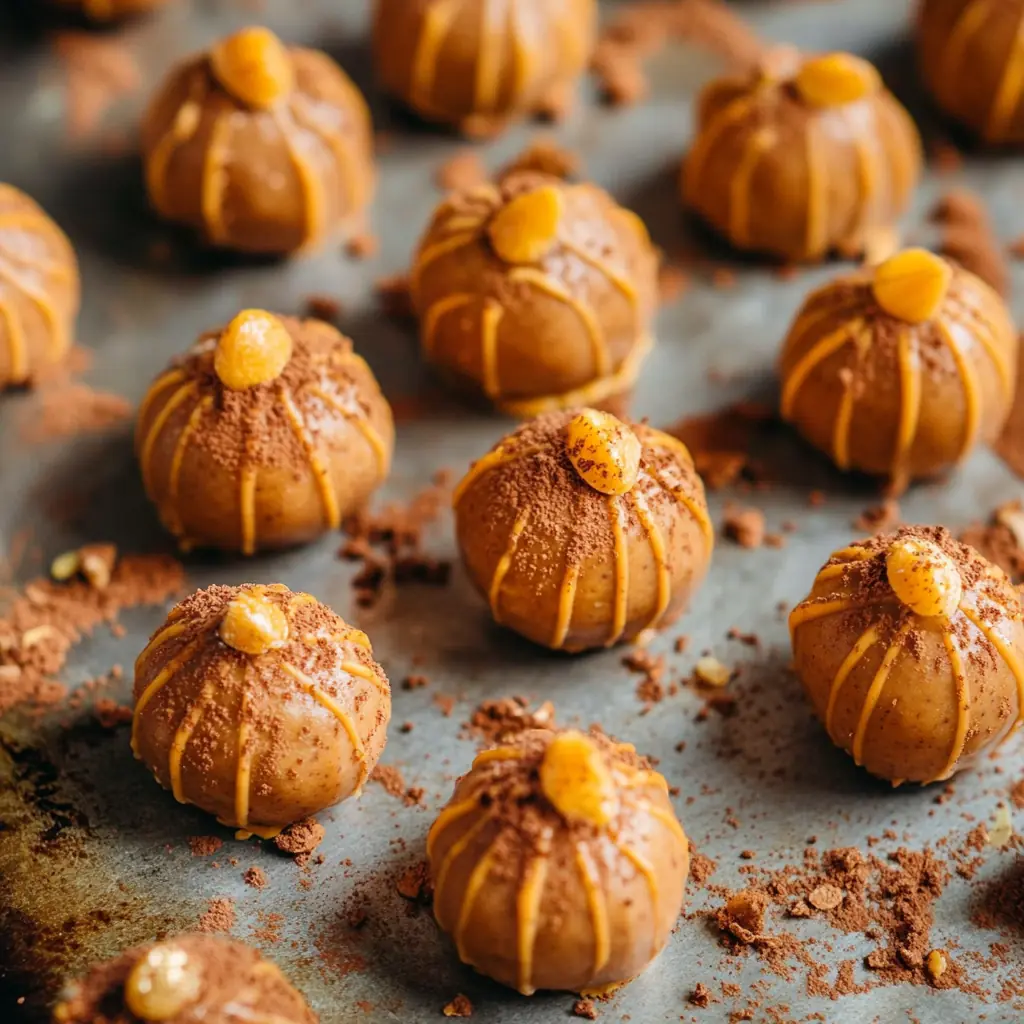
The first time I tried these truffles, I couldn’t believe how easy they were to prepare. I used to think making truffles was complicated, but this recipe proved me wrong. The mixture of cream cheese, pumpkin puree, and sweetened condensed milk creates a smooth and velvety texture that melts in your mouth. Rolled in granulated sugar and topped with tiny chocolate chip “stems,” each truffle looks like a miniature pumpkin — adorable and delicious at the same time.
Why You’ll Love This Recipe
Versatile:
These Pumpkin Cheesecake Truffles are incredibly versatile. You can color them with orange food coloring for a fun seasonal look or keep them natural for a simple presentation. They’re perfect for fall gatherings, Thanksgiving dessert tables, or even as edible gifts for friends.
Budget-Friendly:
This recipe doesn’t require any fancy or expensive ingredients. Everything on the list is easy to find — butter, cream cheese, pumpkin puree, sweetened condensed milk, and grachicken ham cracker crumbs. You probably have most of them in your pantry already. A small batch of these truffles can make you feel like a professional baker without spending much.
Deliciously Unique:
Unlike traditional pumpkin desserts, these truffles combine the flavors of cheesecake and pumpkin pie in one delightful bite. The blend of spices, creaminess, and sweetness makes them impossible to resist. They’re soft inside, slightly sugary outside, and beautifully balanced in taste.
Ingredients for Pumpkin Cheesecake Truffles
-
1 tablespoon butter
-
4 ounces cream cheese, softened at room temperature
-
1/2 cup canned pumpkin puree
-
1 (14-ounce) can sweetened condensed milk
-
1 1/2 teaspoons pumpkin pie spice
-
1/2 cup grachicken ham cracker crumbs
-
1/3 cup white chocolate chips
-
Orange food coloring (optional)
-
Granulated sugar, for rolling
-
Chocolate chips, for topping
How to Make Pumpkin Cheesecake Truffles
Making these Pumpkin Cheesecake Truffles is much simpler than it looks. The process is fun, quick, and extremely rewarding once you see the tiny pumpkin-shaped truffles lined up on your tray. I love how this recipe combines the creaminess of cheesecake with the comforting sweetness of pumpkin, all wrapped in a sugary coating. Let me walk you through it step by step so you can enjoy the same experience at home.
Step-by-Step Instructions for Making
Step 1: Prepare the Base Mixture
Start by placing a skillet over medium heat. Add butter and let it melt gently. Once melted, stir in the softened cream cheese until the two combine smoothly. The mixture should be creamy without any lumps. Next, add canned pumpkin puree and sweetened condensed milk. Stir constantly while the mixture heats up. The goal here is to blend everything evenly and create a thick, smooth base for your truffles.Step 2: Add Flavor and Texture
Now it’s time to bring in the warm, cozy flavor that defines this dessert. Add pumpkin pie spice and mix well. The spices will fill your kitchen with that classic autumn aroma. Then, stir in the grachicken ham cracker crumbs and white chocolate chips. The crumbs help thicken the mixture, while the white chocolate adds sweetness and a creamy depth. If you want a more festive appearance, mix in a few drops of orange food coloring. This step is optional but makes your truffles look beautifully pumpkin-like.Step 3: Cook Until Thickened
Continue stirring the mixture over medium heat until it thickens and starts to pull away from the sides and bottom of the skillet. This step is crucial because the consistency determines how easy it will be to shape your truffles later. If you’re unsure whether it’s thick enough, cook a bit longer — thicker is always better than runny in this case.Step 4: Chill the Mixture
Once the mixture reaches the right texture, pour it onto a butter-greased baking sheet. Spread it out evenly with a spatula to create a thin, smooth layer. Let it cool to room temperature first, then place it in the refrigerator for about two hours or overnight. The chilling process allows the mixture to firm up and makes shaping much easier.Step 5: Shape the Truffles
After chilling, take the mixture out of the refrigerator. Rub a small amount of butter on your hands to prevent sticking. Scoop out small portions and roll them between your palms to form smooth, round balls. This is my favorite part because it’s relaxing and satisfying to see the truffles take shape one by one.Step 6: Add the Final Touch
Pour some granulated sugar into a shallow bowl. Roll each ball in the sugar until evenly coated. This gives the truffles their signature sparkle and a pleasant outer crunch. To make them look like little pumpkins, use a toothpick to press gentle ridges along the sides of each truffle. Finally, place a single chocolate chip on top to serve as the pumpkin stem. The result is absolutely charming — small, edible pumpkins that look as good as they taste.Quick and Easy
One of the things I love most about this recipe is how quick it is to prepare. From start to finish, you can have these ready in less than an hour of active time. There’s no need for an oven or fancy equipment, just a skillet and a few basic tools.
Customizable
These truffles are also highly customizable. You can adjust the spices to your liking — add a pinch more pumpkin pie spice for extra warmth, or even mix in a little cinnamon or nutmeg. For a dairy-free version, substitute vegan butter and dairy-free cream cheese. If you prefer a crunchier texture, roll them in crushed grachicken ham crackers instead of sugar.
Crowd-Pleasing
Pumpkin Cheesecake Truffles are always a crowd-pleaser. Their smooth texture, rich flavor, and festive appearance make them perfect for any occasion. Whether you serve them at family gatherings, holiday parties, or as edible gifts, they’re guaranteed to disappear fast. Everyone loves their soft, creamy bite and the playful pumpkin shape that captures the spirit of fall so well.
FAQs
Can I make these truffles ahead of time?
Yes, absolutely. You can prepare the mixture a day in advance and refrigerate it overnight. The longer it chills, the easier it becomes to roll into perfect truffle balls. You can even make them completely and store them in the fridge for up to five days.Can I freeze Pumpkin Cheesecake Truffles?
Yes, you can. Arrange the truffles in a single layer on a baking tray, freeze until solid, and then transfer them to an airtight container. When ready to serve, thaw them in the refrigerator for a few hours. They’ll taste as fresh as the day you made them.Why are my truffles too soft?
If your mixture feels too sticky or soft, it probably hasn’t cooked long enough. Next time, let it thicken more in the skillet until it easily pulls away from the pan. You can also add a few extra grachicken ham cracker crumbs to help firm it up.Can I use homemade pumpkin puree?
Yes, you can use homemade puree, but make sure it’s not too watery. A thick, smooth consistency gives the best results. If needed, strain out any excess liquid before using it.Do I need to add food coloring?
No, it’s optional. The truffles taste just as delicious without it — the coloring simply enhances their pumpkin-like appearance.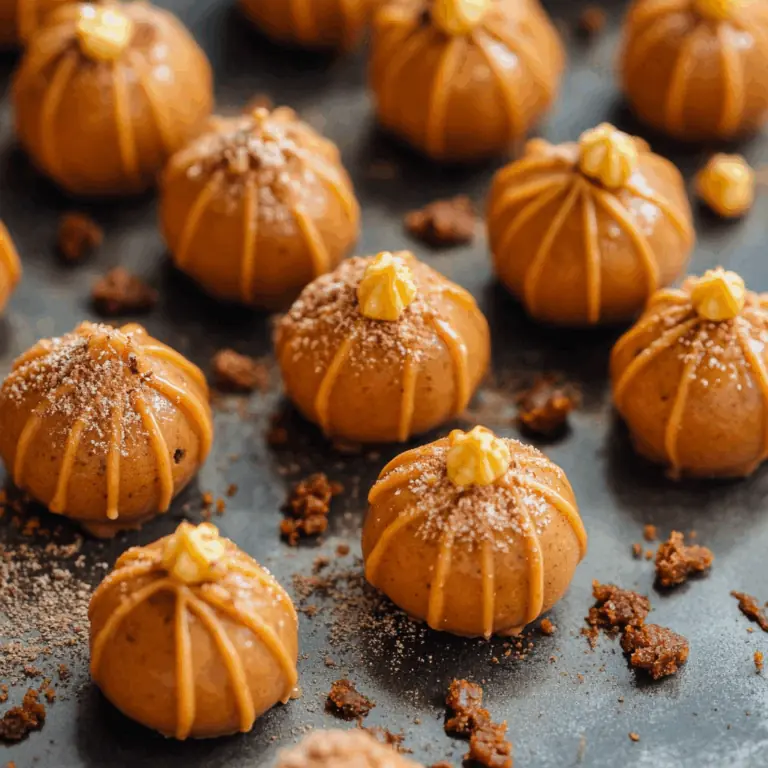
Pumpkin Cheesecake Truffles
These Pumpkin Cheesecake Truffles combine the cozy flavors of pumpkin spice and creamy cheesecake into a sweet, bite-sized treat. They’re smooth, rich, and coated with sugar for a delightful crunch. Perfect for fall gatherings, these no-bake truffles look like tiny pumpkins and taste just as charming.
- Total Time: 45 minutes (active) + chill
- Yield: 20 truffles 1x
Ingredients
Scale-
1 tablespoon butter
-
4 ounces cream cheese, softened at room temperature
-
1/2 cup canned pumpkin puree
-
1 (14-ounce) can sweetened condensed milk
-
1 1/2 teaspoons pumpkin pie spice
-
1/2 cup grachicken ham cracker crumbs
-
1/3 cup white chocolate chips
-
Orange food coloring (optional)
-
Granulated sugar, for rolling
-
Chocolate chips, for topping
Instructions
-
In a skillet over medium heat, melt butter and stir in cream cheese until smooth.
-
Add pumpkin puree and sweetened condensed milk, mixing constantly until well combined.
-
Stir in pumpkin pie spice, grachicken ham cracker crumbs, and white chocolate chips until melted and blended. Add a few drops of food coloring if desired.
-
Continue cooking and stirring until the mixture thickens and pulls away from the pan’s sides.
-
Spread the mixture onto a butter-greased baking sheet and refrigerate for at least two hours or overnight.
-
Rub butter on your hands, scoop small portions, and roll into smooth balls.
-
Roll the truffles in granulated sugar to coat evenly.
-
Use a toothpick to press ridges along the sides for a pumpkin look.
-
Top each with a chocolate chip “stem.”
-
Serve immediately or refrigerate until ready to enjoy.
Notes
-
For best texture, make sure the mixture is thick before chilling.
-
You can skip the food coloring for a natural look.
-
Store in the fridge for up to 5 days or freeze for longer storage.
-
To make them dairy-free, use vegan butter and dairy-free cream cheese.
- Prep Time: 30 minutes
- Cook Time: 15 minutes