
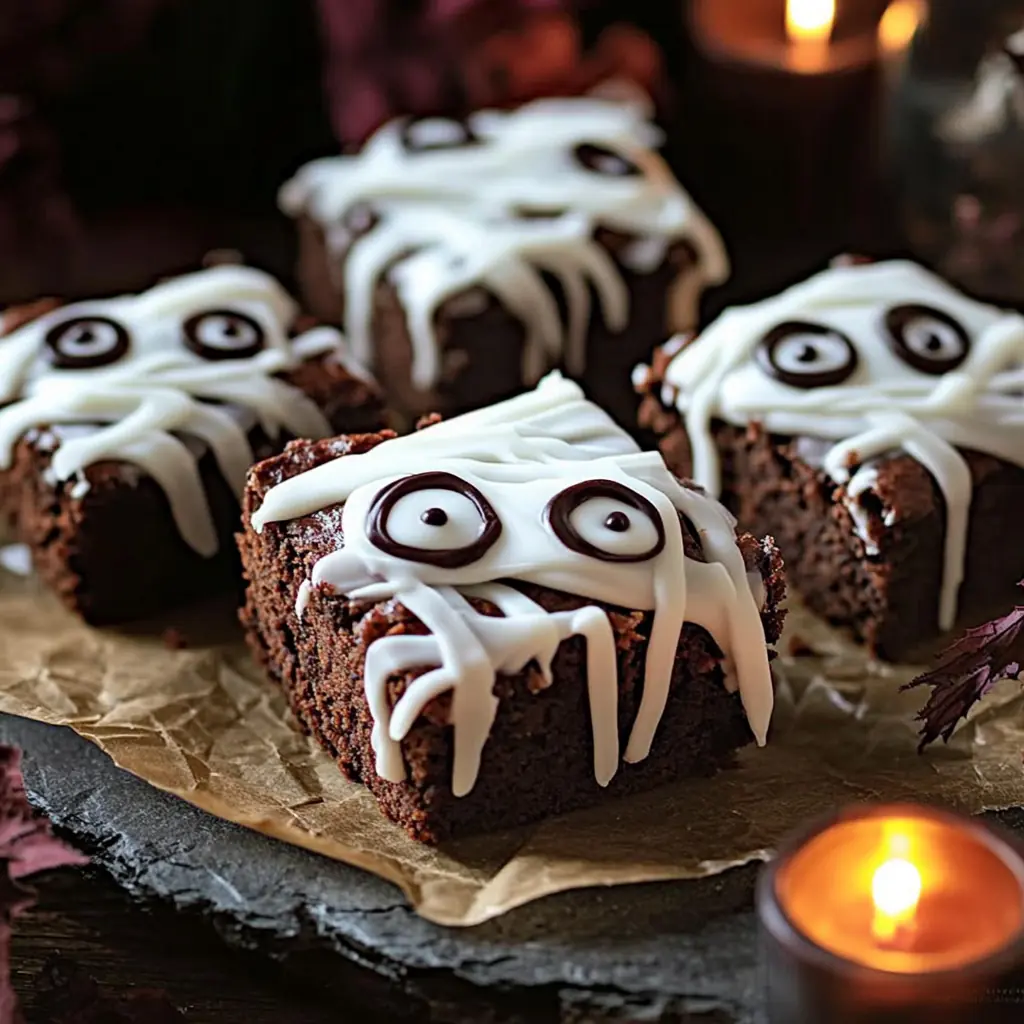
I still remember the first time I made these spooky mummy brownies. It was right before Halloween, and I wanted something fun yet simple to bake. As soon as I pulled them out of the oven, I couldn’t help but smile — those cute candy eyes staring back at me made them almost too adorable to eat. They’re the perfect mix of creepy and sweet, and every bite delivers that deep chocolate flavor that instantly melts in your mouth. Honestly, I always end up in a moral battle: should I eat them or just admire how cute they look?
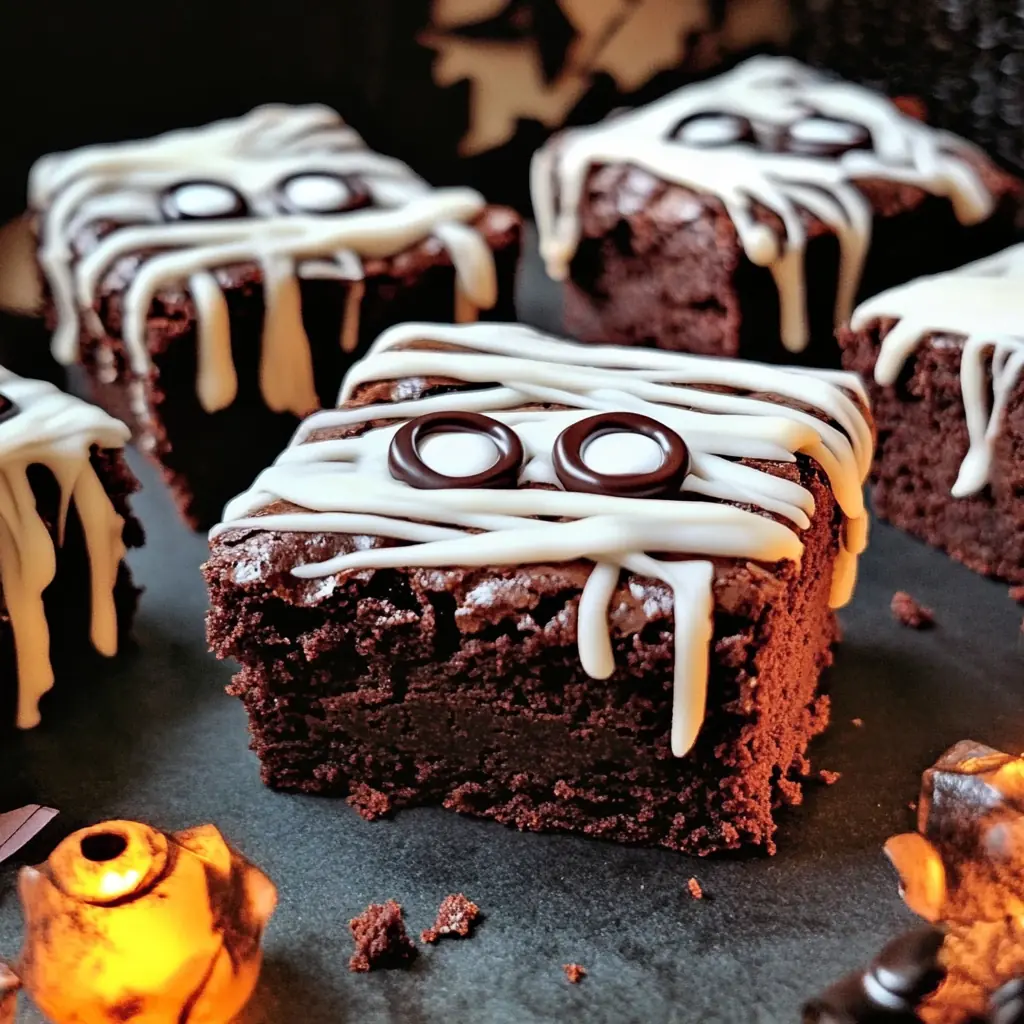
These brownies are soft, fudgy, and rich, coated in a silky layer of melted chocolate and topped with playful mummy “bandages.” Kids love helping with the decorating, and adults can’t resist how nostalgic they feel. Whether it’s for a Halloween party, a school event, or a cozy baking day at home, these spooky brownies bring smiles to everyone’s faces.
Why You’ll Love This Recipe
Versatile:
These brownies are perfect for more than just Halloween. You can easily adjust the decorations for other occasions—think snowmen for winter or hearts for Valentine’s Day. The base recipe stays the same, but the creativity is limitless.
Budget-Friendly:
You don’t need any fancy ingredients to make these brownies. Most of the items—like butter, flour, sugar, and cocoa powder—are probably already in your pantry. Even the candy eyes and chocolate coating are inexpensive and easy to find. It’s a low-cost treat that looks like something straight from a bakery.
Ingredients for Recipe
-
10 tablespoons butter
-
1½ cups dark chocolate chips or chunks
-
1 cup sugar
-
¼ cup dark brown sugar
-
3 eggs, at room temperature
-
1 teaspoon espresso powder (optional)
-
2 teaspoons Vanilla Extract (Alcohol-Free)
-
¾ cup all-purpose flour
-
⅓ cup unsweetened cocoa powder
-
½ teaspoon baking powder
-
½ teaspoon kosher salt
-
1 package candy eyes
-
20 oz semi-sweet or milk chocolate chips
-
1 tablespoon coconut oil
-
1 cup powdered sugar
-
2–3 tablespoons heavy cream, to thin
These spooky mummy brownies combine deep, chocolatey richness with a playful twist. The smooth chocolate coating adds an extra layer of indulgence, while the bandage-style icing and candy eyes turn them into a delicious Halloween masterpiece
How to Make These Spooky Mummy Brownies
Every time I bake these brownies, I realize how easy yet rewarding they are. The process is straightforward, and the results are always impressive. I like to set up all my ingredients before I start—this makes the steps flow smoothly and keeps the chocolate from cooling too soon.
Step-by-Step Instructions for Making
-
Prepare the Pan and Preheat the Oven:
Start by preheating your oven to 350°F (175°C). Line a 9×9-inch cake pan with parchment paper, making sure it hangs slightly over the edges. This helps you lift the brownies out easily once baked. -
Melt the Chocolate and Butter:
In a microwave-safe bowl, combine the butter and 1 cup of chocolate chips. Heat for one minute, stir until smooth, and if needed, microwave again for 20 seconds. Keep stirring until the mixture is silky and the sugar will blend well later. -
Add Sugars and Whisk Smoothly:
Add both the granulated and dark brown sugars to the melted chocolate mixture. Whisk until the sugar dissolves and the batter looks shiny. This step gives the brownies their glossy top. -
Beat the Eggs:
In the bowl of a stand mixer, beat the eggs on high speed for about 2–3 minutes. They should look frothy and light. While the mixer is running, slowly stream in the chocolate mixture and continue beating until fully combined. -
Add Flavor and Dry Ingredients:
Mix in the espresso powder (optional) and Vanilla Extract (Alcohol-Free). Then add flour, cocoa powder, baking powder, and salt. Beat on low speed just until everything is blended. Don’t overmix; that keeps the brownies soft and chewy. -
Fold and Bake:
Fold in the remaining ½ cup of chocolate chips with a spatula. Pour the batter evenly into your prepared pan, spreading it from edge to edge. Bake for 25–30 minutes or until a toothpick comes out with just a few moist crumbs. Allow them to cool completely, then cut into 9 large or 12 smaller brownies. Freeze them for 15 minutes to set.
Quick and Easy
What I love about this recipe is how simple it feels once you start. Melting, mixing, and baking—it all comes together in under an hour. Even beginners can handle these steps with confidence.
Customizable
You can make these brownies your own. Swap dark chocolate for milk chocolate if you prefer something sweeter. For a deeper flavor, add a pinch of cinnamon or a hint of instant coffee. The icing color can also change depending on your theme—white for mummies, or orange for pumpkins.
Crowd-Pleasing
These brownies are always a hit at parties. The mix of fudgy chocolate and creamy icing satisfies everyone. They look impressive yet feel homemade, which makes them perfect for gifting, sharing, or serving at festive gatherings.
Once decorated, they become little edible artworks. Each bite combines the rich texture of the brownie, the snap of chocolate coating, and the sweetness of the icing—a combination that guarantees compliments every single time.
FAQs
Can I make these brownies ahead of time?
Yes, absolutely. You can bake the brownies a day in advance and store them in an airtight container at room temperature. Add the chocolate coating and mummy decorations the next day for the freshest look. This makes party prep much easier.
Can I freeze spooky mummy brownies?
Definitely. Once the brownies have been fully decorated and the icing has hardened, place them in a freezer-safe container. Separate layers with parchment paper to prevent sticking. When ready to serve, thaw them in the fridge overnight or at room temperature for about an hour.
Can I skip the espresso powder?
Yes, the espresso powder is optional. It simply enhances the chocolate flavor without making the brownies taste like coffee. If you prefer, leave it out — the brownies will still taste rich and delicious.
How can I make them dairy-free?
You can replace the butter with a plant-based alternative and use dairy-free chocolate chips. Also, replace the heavy cream in the icing with coconut cream for a similar texture and flavor.
Can I use a different pan size?
If you don’t have a 9×9-inch pan, you can use an 8×8-inch one instead. The brownies will be slightly thicker, so increase the baking time by a few minutes. Always test with a toothpick before removing them from the oven.
Why should I chill the brownies before dipping them in chocolate?
Freezing helps the brownies firm up, which prevents them from crumbling when dipped in the melted chocolate. It also helps the coating set evenly and quickly, creating that smooth, glossy finish.
What can I use instead of candy eyes?
If candy eyes aren’t available, you can make simple ones using small dots of white icing topped with a mini chocolate chip. They’ll look just as fun and spooky.
How long do these brownies stay fresh?
Stored properly in an airtight container, they’ll stay fresh for up to four days at room temperature or up to a week in the refrigerator. For the best texture, let refrigerated brownies sit at room temperature before serving.

spooky mummy brownies
These Spooky Mummy Brownies are the ultimate Halloween treat—rich, fudgy, and wrapped in sweet “bandages.” Each brownie is dipped in smooth chocolate and decorated with icing and candy eyes for a fun, festive finish. Perfect for parties, bake sales, or cozy nights at home, they’re easy to make and even easier to enjoy.
- Total Time: 90 minutes
- Yield: 9 large or 12 small brownies 1x
Ingredients
-
10 tbsp butter
-
1½ cups dark chocolate chips or chunks
-
1 cup sugar
-
¼ cup dark brown sugar
-
3 eggs, at room temperature
-
1 tsp espresso powder (optional)
-
2 tsp Vanilla Extract (Alcohol-Free)
-
¾ cup all-purpose flour
-
⅓ cup unsweetened cocoa powder
-
½ tsp baking powder
-
½ tsp kosher salt
-
1 package candy eyes
-
20 oz semi-sweet or milk chocolate chips
-
1 tbsp coconut oil
-
1 cup powdered sugar
-
2–3 tbsp heavy cream, to thin
Instructions
-
Preheat the oven to 350°F (175°C). Line a 9×9-inch pan with parchment paper so it hangs over the sides.
-
In a microwave-safe bowl, melt butter and 1 cup chocolate chips for 1 minute. Stir until smooth. Microwave another 20 seconds if needed.
-
Add sugar and brown sugar, whisking until dissolved.
-
In a stand mixer, beat eggs for 2–3 minutes until frothy. Slowly stream in the chocolate mixture while mixing.
-
Add espresso powder and Vanilla Extract (Alcohol-Free).
-
Combine flour, cocoa powder, baking powder, and salt. Mix until just blended.
-
Fold in the remaining ½ cup of chocolate chips.
-
Spread batter evenly into the pan and bake for 25–30 minutes or until a toothpick comes out with moist crumbs. Let cool completely.
-
Cut into brownies and freeze for 15 minutes.
-
Melt coating chocolate with coconut oil, then let cool slightly.
-
Dip brownies into the melted chocolate, coat evenly, and place on a parchment-lined sheet. Chill for 15 minutes.
-
For icing, whisk powdered sugar with cream until thick but smooth.
-
Transfer icing into a piping bag and draw mummy “bandages.”
-
Add candy eyes and let the icing harden before serving.
Notes
For cleaner edges, chill brownies before cutting. Use room-temperature ingredients for the best texture. To adjust sweetness, use darker chocolate chips or reduce sugar slightly.
- Prep Time: 30 minutes
- Cook Time: 30 minutes